Introduction
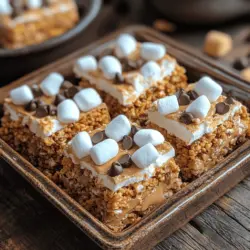
S’mores Bliss Bars bring together the nostalgic flavors of a classic campfire treat, all packed into a convenient, no-bake dessert that is perfect for any occasion. As the sun sets and the fire crackles, the traditional combination of graham crackers, chocolate, and toasted marshmallows has captured hearts and taste buds for generations. However, these delightful bars allow you to enjoy that beloved flavor without the need to gather around a fire pit. With a crunchy texture from Golden Grahams cereal, the gooey goodness of mini marshmallows, and the rich taste of chocolate, S’mores Bliss Bars offer a quick and satisfying treat for any sweet tooth.
Perfect for parties, potlucks, or simply as an afternoon snack, these bars are not only simple to make but also incredibly satisfying. In this article, we will explore the ingredients that make up this delicious treat, step-by-step instructions for crafting the perfect bars, and tips for enhancing your S’mores Bliss Bars experience.
Understanding the Ingredients
To create the perfect S’mores Bliss Bars, it’s essential to understand the role each ingredient plays in achieving that beloved s’mores flavor. Here’s a breakdown of the key components:
Golden Grahams Cereal
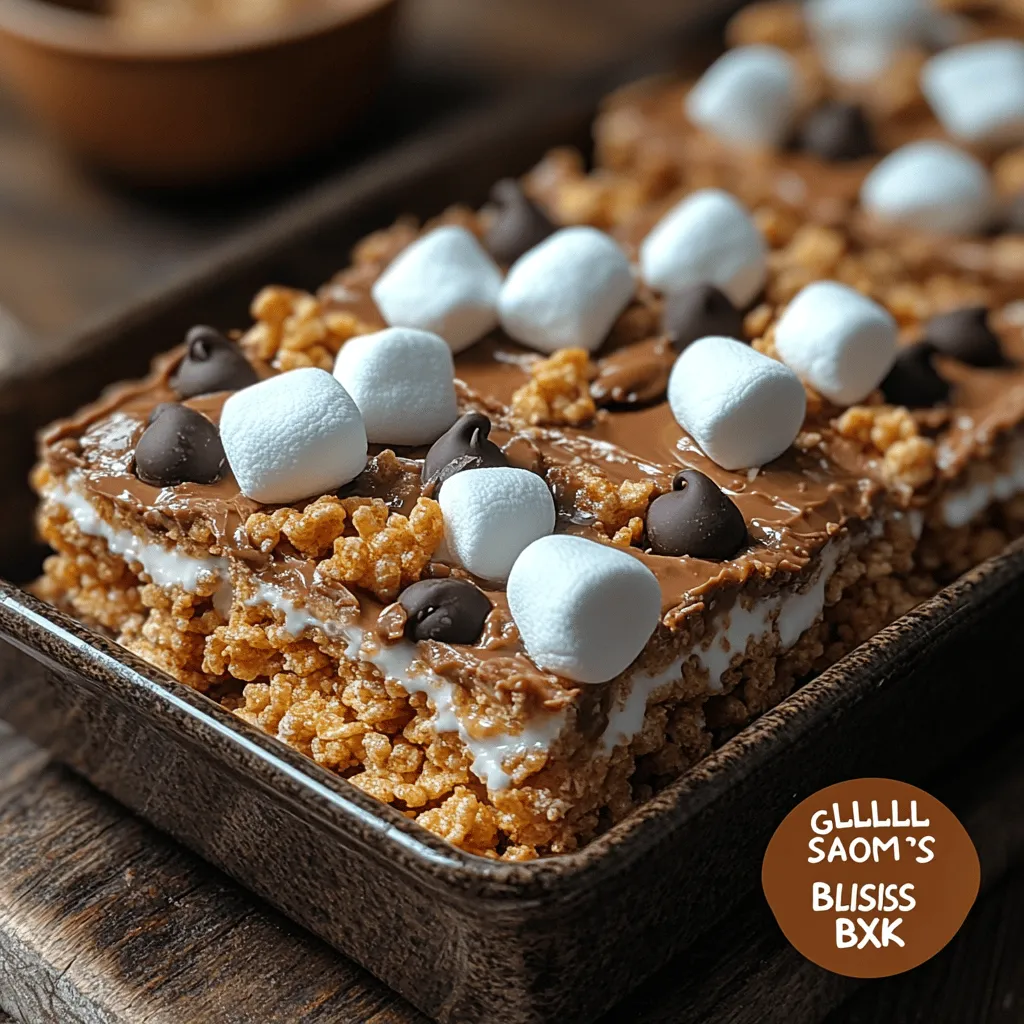
Golden Grahams cereal serves as the foundation of these bars, providing a crunchy texture reminiscent of graham crackers. Its sweet, honey-infused flavor adds a delightful sweetness that complements the other ingredients. The cereal’s sturdiness ensures that the bars hold together well, making them easy to cut and serve. This cereal is the perfect base for S’mores Bliss Bars, bridging the gap between traditional s’mores and a modern, convenient dessert.
Mini Marshmallows
No s’mores treat would be complete without marshmallows, and mini marshmallows in this recipe contribute to the chewy texture and sweetness that defines the classic dessert. As they melt slightly during the mixing process, they mimic the gooeyness of toasted marshmallows from a campfire. Their small size also allows for even distribution throughout the bars, ensuring that each bite is packed with marshmallow goodness.
Chocolate Chips
Chocolate chips are the star ingredient that brings richness and indulgence to S’mores Bliss Bars. Whether you choose semi-sweet or milk chocolate, each option offers a different flavor profile. Semi-sweet chocolate provides a deeper, more complex taste, while milk chocolate delivers a creamier and sweeter experience. The choice between the two depends on your personal preference, but either will enhance the overall flavor of the bars.
Creamy Peanut Butter
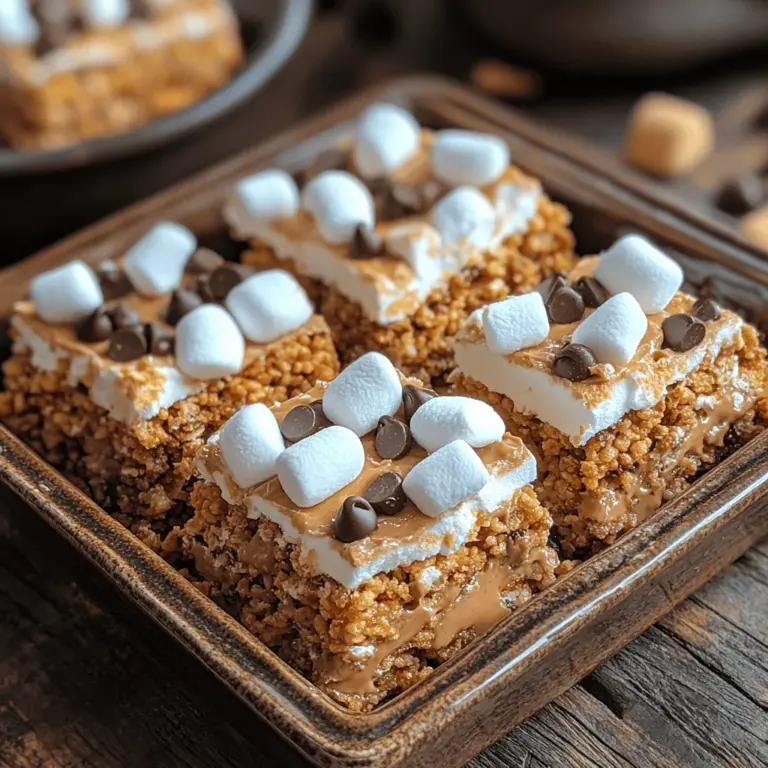
Creamy peanut butter is a key player in these bars, adding a rich, nutty flavor and a smooth texture. It not only enhances the taste but also helps bind the ingredients together, creating a cohesive bar that is easy to cut into squares. The combination of chocolate and peanut butter is a classic pairing that elevates the flavors of the S’mores Bliss Bars, making them even more decadent.
Unsalted Butter
Using unsalted butter is crucial in this recipe as it allows you to control the overall saltiness of the bars. The butter adds richness and moisture, ensuring that the bars don’t dry out. By opting for unsalted butter, you can balance the flavors more effectively, allowing the sweetness of the marshmallows and chocolate to shine through without being overwhelmed by saltiness.
Powdered Sugar
Powdered sugar plays a vital role in achieving a sweet and smooth texture in the S’mores Bliss Bars. It dissolves easily in the mixture, creating a creamy base that ensures each bite is sweet without being overly sugary. The fine texture of powdered sugar helps bind the ingredients together, giving the bars their signature structure.
Vanilla Extract and Salt
A splash of vanilla extract enhances the overall flavor profile of the bars, adding warmth and depth. It complements the sweetness of the marshmallows and chocolate, creating a well-rounded taste experience. A pinch of salt is also important; it balances the sweetness and enhances the flavors of the other ingredients, ensuring that each bite is perfectly balanced.
Optional Toppings
To take your S’mores Bliss Bars to the next level, consider adding optional toppings such as extra mini marshmallows or chocolate chips. Not only do these toppings add visual appeal, making the bars look more enticing, but they also enhance the flavor and texture. A sprinkle of graham cracker crumbs on top can also add an extra crunch, reminiscent of the classic s’mores experience.
Step-by-Step Instructions
Now that you understand the ingredients that come together to create these delicious S’mores Bliss Bars, let’s move on to the step-by-step instructions for making them.
Preparing the Pan
Before you begin mixing the ingredients, it’s important to prepare your baking dish properly. You can use a 9×13-inch baking pan for this recipe. Start by greasing the pan with a thin layer of butter or non-stick cooking spray to prevent the bars from sticking. Alternatively, you can line the pan with parchment paper, allowing some overhang on the sides for easy removal of the bars once they are set. This method also makes for easier cleanup, as you can simply lift the bars out of the pan using the parchment paper.
Melting the Mixture
The next step involves melting the butter and peanut butter together. In a large saucepan, combine 1/2 cup of unsalted butter and 1 cup of creamy peanut butter over low to medium heat. Stir continuously until both ingredients are fully melted and well incorporated. This process is crucial; continuous stirring ensures that the mixture doesn’t burn and that the flavors meld together perfectly. Once the mixture is smooth and creamy, remove it from the heat.
Incorporating Sugar and Vanilla
After removing the saucepan from the heat, it’s time to add the powdered sugar and vanilla extract. Gradually sift in 2 cups of powdered sugar, stirring until it’s completely incorporated into the melted butter and peanut butter mixture. The goal is to achieve a smooth, creamy consistency without any lumps. This is where the sweetness of the bars starts to take shape.
Next, add 1 teaspoon of pure vanilla extract and a pinch of salt. Stir until everything is well combined, creating a luscious mixture that will form the base of your S’mores Bliss Bars. The combination of flavors at this stage is already enticing, and you can almost imagine the delicious treats that are about to come together.
Now that you have the fundamental components ready, the next steps will guide you through incorporating the cereal and marshmallows, and ultimately pouring the mixture into the prepared pan to set. Stay tuned for the remaining instructions that will lead you to your own batch of S’mores Bliss Bars!
Mixing in Powdered Sugar and Vanilla Extract
To create the creamy, sweet base for your S’mores Bliss Bars, start by mixing in the powdered sugar and vanilla extract. Begin with a clean mixing bowl and ensure that your butter and cream cheese mixture is at room temperature for easier blending. Gradually add the powdered sugar, about one cup at a time, to prevent a sugary cloud from forming. Using an electric mixer on low speed, combine the ingredients until they are well blended, gradually increasing to medium speed for a smoother consistency.
When adding the vanilla extract, use pure vanilla for the best flavor. Start with one teaspoon and taste the mixture. If you desire a more pronounced vanilla taste, you can add a bit more. Continue to mix until the mixture is light and fluffy, ensuring there are no lumps of powdered sugar remaining. The end result should be a smooth, creamy mixture that sets the foundation for your bars.
Combining with Cereal
Next, it’s time to incorporate the cereal and mini marshmallows. The key here is to fold the ingredients rather than stirring vigorously, which can break down the cereal and marshmallows. Begin by adding your cereal to the creamy mixture in small batches. Use a spatula to gently lift and fold the mixture from the bottom of the bowl, allowing the cereal to become coated without crushing it.
Once the cereal is evenly distributed, add in the mini marshmallows. Like with the cereal, fold them in carefully. This technique maintains the texture and volume of both the cereal and the marshmallows, ensuring that each bite of the S’mores Bliss Bars is filled with that delightful chewy marshmallow goodness.
Adding Chocolate
Now that you have a well-combined mixture, it’s time to add the chocolate chips. Choose semi-sweet or milk chocolate chips based on your preference. To incorporate the chocolate chips without breaking them, sprinkle them over the top of the cereal mixture rather than dumping them in all at once. Gently fold them into the mixture, ensuring that they are evenly distributed throughout without mashing them.
For added indulgence, consider using a mix of chocolate chips and chunks. This will provide various textures and enhance the overall chocolate experience in your bars. Remember, the goal is to keep the chocolate intact so that you get delightful bursts of chocolate in each bite.
Pressing Mixture into the Pan
With all the ingredients combined, it’s time to transfer the mixture to your prepared baking dish. Using a spatula, scoop the mixture into the pan, spreading it evenly across the bottom. To compact the mixture, lightly moisten your hands or the back of the spatula with a bit of cooking spray or water, then press down firmly but gently until the mixture is packed tightly. This step is crucial for ensuring that the bars hold together well once they are cooled and cut.
Make sure to smooth the top of the mixture with your spatula for a neat appearance. The more compact the mixture, the less likely it is to crumble when you cut the bars.
Topping and Cooling
To elevate the S’mores Bliss Bars, you can add a topping of chocolate drizzle or additional mini marshmallows. For a chocolate drizzle, simply melt some chocolate chips in a microwave-safe bowl, stirring every 30 seconds until smooth. Drizzle the melted chocolate over the top of the pressed mixture using a spoon or a piping bag for more control.
After adding any toppings, allow the bars to cool at room temperature for about an hour. Once they have cooled slightly, transfer them to the refrigerator to set for at least two hours. This chilling period will help the bars firm up, making them easier to cut.
Cutting and Serving
Once the S’mores Bliss Bars are fully cooled, it’s time to cut them into uniform pieces. Using a sharp knife, start by cutting into squares, rectangles, or any shape you prefer. For the cleanest cuts, wipe the knife with a damp cloth between cuts to prevent sticking.
These bars can be served as is or with a scoop of ice cream for a delicious dessert. For a fun presentation, consider serving them on a platter with extra chocolate sauce or whipped cream on the side for dipping. They are perfect for sharing at parties, family gatherings, or simply enjoying at home.
Nutritional Information
Caloric Content: Each S’mores Bliss Bar contains approximately 200 calories, depending on the specific ingredients used and portion size. The bars are rich in carbohydrates due to the cereal and sugar, with moderate fat content from the butter and chocolate.
Dietary Considerations: For those with dietary restrictions, there are several ways to modify the recipe. For a gluten-free version, substitute the cereal with gluten-free options. You can also use a dairy-free butter and cream cheese alternative for a vegan-friendly version. Opting for dark chocolate can reduce sugar content while offering a rich flavor, making these bars a slightly healthier treat.
The Versatility of S’mores Bliss Bars
Occasions for Enjoying: S’mores Bliss Bars are versatile and perfect for a variety of occasions. They are an excellent choice for birthday parties, picnics, and potlucks where you want to impress guests with minimal effort. These bars are also a fun treat for movie nights or a sweet addition to a camping-themed gathering, bringing that classic s’mores flavor without the need for a campfire.
Storage Tips: To maintain the freshness and flavor of your S’mores Bliss Bars, store them in an airtight container at room temperature for up to a week. If you want to keep them longer, refrigerate them for up to two weeks or freeze them for up to three months. When freezing, make sure to wrap each bar individually in plastic wrap and place them in a freezer-safe bag to prevent freezer burn.
Customization Ideas: The beauty of S’mores Bliss Bars is their versatility. Feel free to customize your bars by adding different mix-ins such as nuts, dried fruits, or even crushed cookies for added texture. You can also experiment with flavored chocolate chips, such as peanut butter or caramel, to create unique flavor combinations. For a more decadent experience, consider layering in a peanut butter or caramel drizzle between the layers.
Conclusion
In summary, S’mores Bliss Bars are an easy and delicious treat that encapsulates the essence of s’mores while providing a convenient no-bake option. The delightful combination of creamy, crunchy, and chewy textures makes these bars a crowd-pleaser for both kids and adults alike. Whether enjoyed fresh or stored for later, they offer a nostalgic taste of summer and a sweet indulgence for any occasion. With endless possibilities for customization and serving, these S’mores Bliss Bars are sure to become a favorite in your dessert repertoire. So gather your ingredients, unleash your creativity, and enjoy this delightful treat!