Introduction
In recent years, there has been a noticeable shift in snacking habits, with a growing number of people seeking healthier alternatives to traditional snacks. As consumers become more health-conscious, the demand for nutritious yet satisfying snack options has surged. Among these alternatives, zucchini chips have emerged as a popular choice, providing an excellent way to enjoy a crunchy treat without the guilt associated with conventional potato chips.
Zucchini chips are not only a delicious and crispy snack but also a nutrient-dense option that can easily fit into a variety of dietary plans. Unlike their fried counterparts, oven-baked zucchini chips retain a satisfying crunch and are significantly lower in calories and unhealthy fats. This method of preparation allows you to enjoy the flavors of this versatile vegetable while reaping the benefits of a heart-healthy snack.
The Allure of Zucchini Chips
Zucchini, often celebrated for its culinary versatility, is a summer squash that is packed with nutritional benefits. It is low in calories and rich in dietary fiber, making it an excellent choice for those looking to maintain a healthy weight or increase their fiber intake. One medium-sized zucchini contains approximately 33 calories, 2 grams of protein, and 1 gram of fat, alongside a variety of essential vitamins and minerals, including vitamin C, potassium, and vitamin B6.
The high water content of zucchini, which is about 95%, contributes to its refreshing taste, while the fiber helps keep you feeling full longer. This makes zucchini chips not only a guilt-free snacking option but also a smart choice for those looking to curb cravings between meals. Furthermore, zucchini is incredibly versatile; it can be sautéed, grilled, stuffed, spiralized, or transformed into chips, allowing for endless culinary creativity.
Ingredients Breakdown
To create the perfect crispy oven-baked zucchini chips, you’ll need a handful of key ingredients that enhance the flavor and texture of the final product. Here’s a breakdown of the essential components:
– Zucchini: The star of the show! Select fresh, firm zucchinis that are free of blemishes. Opting for medium-sized zucchinis ensures that you get a good balance of flesh and skin, which adds to the overall texture.
– Olive Oil: A high-quality extra virgin olive oil not only enhances the flavor but also helps the seasonings adhere to the zucchini. It also contributes to the crispiness of the chips when baked.
– Salt: A crucial ingredient that enhances the natural flavors of the zucchini. It also plays a key role in the osmosis process, which helps draw out moisture from the vegetables, resulting in a crispier chip.
– Seasoning Mix: This is where you can get creative! A blend of garlic powder, onion powder, and smoked paprika provides a robust flavor profile. These seasonings not only add depth to the zucchini chips but also create an aromatic experience.
Optional ingredients like Parmesan cheese can elevate the flavor further, offering a savory twist that pairs beautifully with the zucchini. Fresh herbs such as thyme or rosemary can also be added for an aromatic touch.
Using fresh ingredients is paramount for achieving the best flavor and texture. The quality of the zucchini and the freshness of your spices will make a significant difference in the final result.
Preparation Steps for Perfect Zucchini Chips
Creating crispy oven-baked zucchini chips is a straightforward process, but there are a few essential steps that will ensure your chips turn out perfectly each time.
Preheating the Oven
The first step in preparing your zucchini chips is to preheat your oven. Setting your oven to a low temperature, around 225°F (107°C), is crucial for dehydrating the zucchini slices rather than roasting them. This gentle heat allows the moisture to evaporate slowly, resulting in a crispier texture.
Preparing the Zucchini
Once your oven is preheated, it’s time to prepare your zucchini. Begin by washing the zucchinis thoroughly to remove any dirt or pesticides. After drying them, slice the zucchini into thin, uniform rounds. Achieving uniformity is essential, as this ensures even cooking and prevents some chips from burning while others remain undercooked.
For slicing, you can use either a sharp knife or a mandoline. While a knife offers more control, a mandoline allows you to achieve perfectly even slices with minimal effort. If using a mandoline, exercise caution and use a hand guard to protect your fingers.
Salting the Zucchini
After slicing the zucchini, the next step is salting. This process is vital for drawing out excess moisture from the slices. When salt is applied, it creates a process known as osmosis, where water moves from an area of high concentration (inside the zucchini) to an area of lower concentration (the surface). As the water is drawn out, the zucchini becomes less watery, which helps enhance the crispiness of the chips during baking.
To salt your zucchini, simply sprinkle a light layer of salt over the slices and let them sit for about 15-30 minutes. You’ll notice beads of moisture forming on the surface. After this time, pat the slices dry with a paper towel to remove excess salt and moisture.
Drying the Slices
Before seasoning your zucchini chips, it’s crucial to ensure that they are adequately dried. This step is essential as any residual moisture can hinder the crisping process during baking. After salting and patting them dry, you can place the zucchini slices on a clean kitchen towel or paper towels to absorb any remaining moisture.
Seasoning Your Zucchini Chips
Now that your zucchini slices are prepped and dried, it’s time to season them. In a small bowl, combine your chosen seasonings—garlic powder, onion powder, and smoked paprika. This flavorful blend will give your zucchini chips a savory kick that enhances their natural taste.
Drizzle the dried zucchini slices with olive oil, tossing gently to coat each slice evenly. Then sprinkle the seasoning mix over the slices, ensuring that they are well-coated with the flavorful blend. The oil not only helps the seasonings stick but also contributes to the crispy texture that we are aiming for.
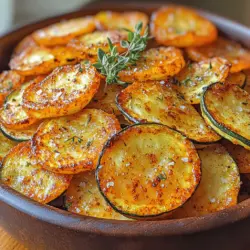
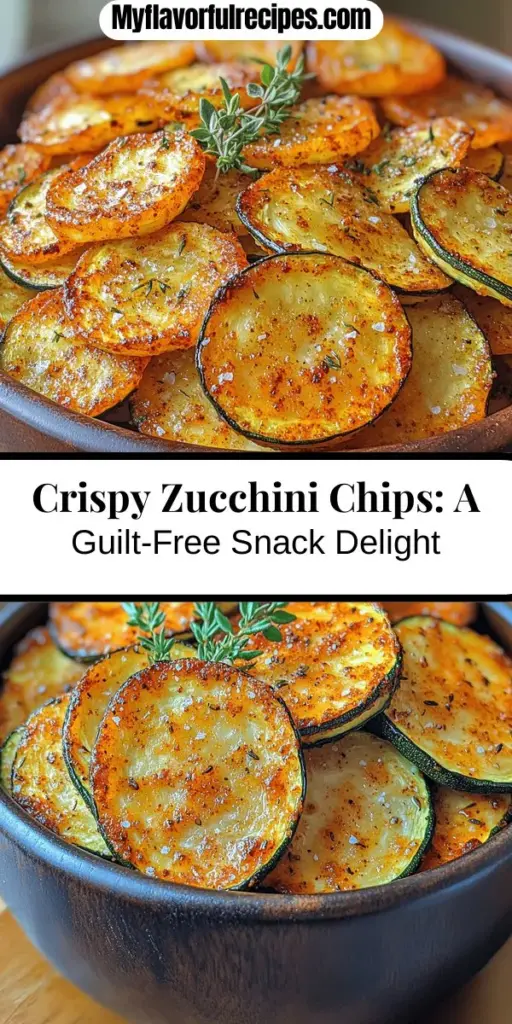
By following these preparation steps, you set the stage for creating irresistibly crispy zucchini chips that are sure to impress. Whether enjoyed alone, dipped in your favorite sauce, or paired with a sandwich, these zucchini chips are a snack that you can feel good about indulging in.
{{image_1}}
How to Customize Seasonings Based on Personal Preference
One of the joys of making crispy oven-baked zucchini chips is the freedom to customize the seasonings to suit your taste. While the basic recipe often includes salt and pepper, feel free to explore a variety of flavor profiles. For a spicy kick, add cayenne pepper or chili powder. If you prefer a savory touch, consider garlic powder or onion powder. For a cheesy flavor without the dairy, nutritional yeast can be a fantastic addition. Alternatively, fresh or dried herbs such as thyme, rosemary, or oregano can elevate your zucchini chips, giving them a delightful herbal aroma.
Mix and match these seasonings to create your unique blend. You can also try seasoning blends like Italian seasoning, Cajun spice, or smoked paprika for a distinct twist. Remember to start with small amounts and adjust according to your taste preferences.
Importance of Evenly Coating the Zucchini Slices
Achieving the perfect crispy texture in your zucchini chips largely depends on how evenly you coat the slices with oil and seasonings. An even coat ensures that each slice receives the same amount of flavor and crisping ability during the baking process. To do this effectively, use a large bowl to toss the zucchini slices with your oil and seasonings. This method allows for thorough coverage without over-saturating any single slice, which can lead to sogginess.
Baking Process
Spacing and Arrangement of Zucchini Slices on the Baking Sheet
When it comes to baking zucchini chips, the arrangement is crucial. Lay your coated zucchini slices in a single layer on the baking sheet, making sure they are not overlapping. Overlapping slices can trap moisture and result in less crispiness. If you find you have too many slices for one pan, consider baking them in batches or using multiple baking sheets.
Significance of Parchment Paper for Easy Cleanup and Preventing Sticking
Using parchment paper is highly recommended for this recipe. Not only does it prevent the zucchini chips from sticking to the baking sheet, but it also makes cleanup a breeze. Parchment paper allows for even heat distribution while providing a non-stick surface that ensures your chips come off easily once they are done baking. If you don’t have parchment paper, you can also lightly grease the baking sheet, but keep in mind that this might slightly increase the cleanup time.
Baking Time and Temperature: What to Expect During the Baking Process
Preheat your oven to 225°F (107°C) for a slow bake that promotes crispiness without burning. Bake the zucchini chips for 2 to 3 hours, keeping a close eye on them during the last half hour to avoid over-baking. The goal is to achieve a golden brown color and a satisfying crunch. Depending on the thickness of your slices, baking times may vary, so it’s important to check them periodically.
Tips for Checking for Doneness and Rotating the Baking Sheet
To check for doneness, look for a golden color and a firm texture. Zucchini chips should feel crispy to the touch. It’s a good idea to rotate the baking sheet halfway through the cooking time to ensure even baking, especially if your oven has hot spots. Gently flip the chips with a spatula if necessary to promote uniform crispiness.
Cooling and Serving Suggestions
Why Cooling is Essential for Achieving Maximum Crispiness
Once your zucchini chips are done baking, resist the temptation to dive in immediately. Allow them to cool on the baking sheet for at least 10 minutes. This step is crucial as it helps the chips firm up further, enhancing their crispiness. Cooling on a wire rack can also help if you want to ensure that air circulates around them, preventing any moisture buildup.
Creative Serving Suggestions: Pairing with Dips or Enjoying Plain
Crispy zucchini chips can be enjoyed on their own, but they also pair beautifully with a variety of dips. Consider serving them with hummus, tzatziki, or a creamy ranch dressing for a delightful contrast in flavors and textures. Alternatively, a spicy salsa or guacamole can add an exciting twist. You can also serve them alongside a fresh salad or as a crunchy topping on soups for added texture.
Suggestions for Garnishing with Fresh Herbs for Added Flavor
To elevate your zucchini chips further, consider garnishing them with fresh herbs once they’ve cooled. A sprinkle of chopped parsley, basil, or cilantro can add a pop of freshness that complements the savory flavors of the chips. For a more gourmet touch, drizzle with a little balsamic glaze or sprinkle with grated Parmesan cheese just before serving.
Exploring Variations of Zucchini Chips
Different Seasoning Blends to Try: Spicy, Cheesy, or Herb-Infused
The versatility of zucchini chips allows for endless experimentation with different seasoning blends. For a spicy version, combine cayenne pepper, garlic powder, and smoked paprika. If you’re craving something cheesy, try a mix of nutritional yeast with Italian herbs for a savory, umami-rich flavor. For those who love fresh herbs, a blend of dill, parsley, and garlic powder can create an herb-infused delight. Don’t hesitate to experiment and find your favorite combinations.
Alternative Cooking Methods: Air Frying vs. Traditional Oven Baking
If you’re looking for a quicker cooking method, consider using an air fryer. Air frying zucchini chips can provide a similar crispy texture in a shorter amount of time—typically around 15 to 20 minutes at 375°F (190°C). The advantage of the air fryer is that it uses less oil and can yield even crispier results. Just be sure to monitor the cooking process closely, as air fryers can vary significantly in heat distribution.
Incorporating Other Vegetables for a Colorful Snack Platter
Zucchini chips can be just the beginning. Feel free to incorporate other vegetables into your chip-making endeavors. Sweet potatoes, carrots, and beets can be sliced thin and treated similarly to zucchini for a vibrant, colorful platter of chips. Each vegetable will bring its unique flavor and nutritional benefits, making your snack not only more appealing but also healthier.
Culinary Tips for Success
Common Pitfalls to Avoid When Making Zucchini Chips
One common pitfall when making zucchini chips is using slices that are too thick. Slices should be no more than 1/8 inch thick to ensure they become crispy rather than soggy. Another mistake is overcrowding the baking sheet, which can trap moisture and lead to uneven cooking. Additionally, not drying the zucchini slices thoroughly before seasoning can result in chips that don’t crisp up as desired.
How to Store Leftover Zucchini Chips for Maximum Freshness
If you happen to have any leftover zucchini chips, store them in an airtight container at room temperature. They will stay crispy for about 2 to 3 days. Avoid refrigerating them, as this can introduce moisture and lead to sogginess. To revive chips that have lost their crispiness, place them back in a preheated oven at 350°F (175°C) for a few minutes to re-crisp.
Adjusting Baking Times Based on Thickness of Slices
Since zucchini can vary in size, it’s important to adjust your baking times based on the thickness of your slices. Thicker slices may take longer than the average 2 to 3 hours, while thinner slices might cook faster. Keep a close watch during the last 30 minutes of baking and be prepared to remove the chips as they reach that perfect golden color.
Conclusion
Crispy oven-baked zucchini chips are not just a delightful snack; they are also packed with nutrients and offer a healthier alternative to traditional chips. Rich in vitamins and low in calories, zucchini chips can satisfy your cravings without the guilt. This recipe allows for endless customization, encouraging you to experiment with different seasonings, cooking methods, and vegetable varieties.
As you embrace this simple yet rewarding recipe, consider incorporating more vegetable-based snacks into your daily diet. Not only will you enjoy delicious, crunchy treats, but you’ll also be making a positive impact on your overall health. So grab those zucchinis and get ready to create a wholesome snack that your taste buds will love!