
Introduction
If you’ve ever craved the comforting warmth of freshly baked cinnamon rolls while simultaneously longing for the indulgent taste of Oreo cookies, then you’re in for a treat with this recipe. The fusion of flavors in these Oreo Cookies and Cream Cinnamon Rolls creates a delightful experience that takes the classic cinnamon roll to a whole new level. With layers of soft, pillowy dough filled with a luscious mixture of brown sugar, cinnamon, and crushed Oreo cookies, these treats will not only satisfy your sweet tooth but also provide a unique twist that makes them stand out.
Baking is an art that combines science and passion, allowing us to share our creations with loved ones during special occasions or simply as a way to indulge ourselves. The joy of pulling apart a warm, gooey cinnamon roll and discovering the delightful surprise of Oreo cookies woven within is a moment that brings happiness to both the baker and those fortunate enough to partake in the deliciousness. This recipe is perfect for family gatherings, brunches, or as an after-dinner dessert that’s sure to impress.
Let’s embark on this culinary adventure and learn how to craft these ooey-gooey Oreo cookies and cream cinnamon rolls that are sure to become a household favorite.
Understanding the Ingredients
Before diving into the baking process, it’s crucial to understand the ingredients that will come together to create these irresistible cinnamon rolls. Each component plays a vital role in achieving the perfect texture, flavor, and overall experience.
Dough Ingredients
The foundation of any great cinnamon roll lies in its dough. For our Oreo Cookies and Cream Cinnamon Rolls, you will need:
– All-Purpose Flour: This is the primary ingredient that provides structure to the dough. All-purpose flour has a moderate protein content, which helps to create a balanced texture that is both soft and chewy.
– Yeast: Active dry yeast is essential for leavening, which allows the dough to rise and become light and fluffy. Yeast ferments the sugars in the dough, producing carbon dioxide that creates air bubbles, making the rolls tender.
– Sugar: Granulated sugar sweetens the dough and also feeds the yeast, enhancing the rising process while contributing to the overall flavor.
Filling Ingredients
The filling is where the magic happens, transforming simple cinnamon rolls into a gourmet treat. The ingredients for the filling include:
– Brown Sugar: Using brown sugar in your filling adds moisture and a hint of caramel flavor, creating a rich base that pairs beautifully with the warmth of cinnamon.
– Cinnamon: This aromatic spice is a classic component of cinnamon rolls, providing that signature warm flavor that complements the sweetness of the sugar.
– Crushed Oreos: The star ingredient! Crushed Oreo cookies bring a delightful crunch and chocolate flavor that elevates the traditional cinnamon roll to a whole new level of indulgence.
Cream Cheese Glaze
No cinnamon roll is complete without a decadent glaze, and for these rolls, a cream cheese glaze is the perfect finishing touch. Here’s why:
– Sweetness and Creaminess: The balance of tangy cream cheese with powdered sugar creates a glaze that is both sweet and slightly tangy, enhancing the overall flavor profile of the cinnamon rolls. The creaminess adds a luxurious texture that complements the gooey filling perfectly.
Step-by-Step Guide to Making the Dough
Creating the perfect dough is essential for achieving those delightful, fluffy cinnamon rolls. Here’s a step-by-step guide to making the dough.
Importance of Activating the Yeast
The first step in making your dough involves activating the yeast. This process is crucial as it ensures that your yeast is alive and ready to work its magic. Here’s how to do it effectively:
1. Warm Water: Start by measuring out warm water (between 100°F and 110°F). It should feel warm to the touch but not hot, as excessive heat can kill the yeast.
2. Add Yeast and Sugar: Sprinkle the active dry yeast and a pinch of sugar into the warm water. The sugar acts as food for the yeast, encouraging it to multiply.
3. Wait and Watch: Allow the mixture to sit for about 5-10 minutes. You’ll know the yeast is activated when it becomes frothy and bubbly, indicating that it is ready to be incorporated into your dough.
Kneading Techniques for Optimal Dough Consistency
Once your yeast is activated, it’s time to combine all the dough ingredients and knead them into a cohesive mixture. Here’s how to do it:
1. Combine Ingredients: In a large mixing bowl, combine the activated yeast mixture with all-purpose flour, sugar, and a pinch of salt. Mix until the dough begins to come together.
2. Kneading: Transfer the dough to a lightly floured surface. Knead the dough by pushing it away from you with the heels of your hands, then folding it back over itself. Rotate the dough a quarter turn and repeat the process.
– Tip: Knead the dough for about 8-10 minutes until it is smooth and elastic. If the dough is too sticky, sprinkle a little more flour as needed, but be cautious not to add too much, as it can make the rolls dense.
Rising Process and Its Significance
After kneading, the dough needs to rise to develop flavor and texture. This process, known as fermentation, is essential for creating that light, fluffy roll.
1. Create a Warm Environment: Place the kneaded dough in a lightly greased bowl, covering it with a clean kitchen towel or plastic wrap. Find a warm spot in your kitchen—an oven with just the light on or a sunny windowsill works well.
2. Rising Time: Allow the dough to rise until it has doubled in size, which usually takes about 1 to 2 hours. The warm environment activates the yeast, resulting in a beautiful rise.
Crafting the Perfect Filling
Now that your dough is rising beautifully, it’s time to prepare the luscious filling that will make these cinnamon rolls truly unforgettable.
Combining Ingredients for a Luscious Filling
To create the filling, gather the following ingredients:
– Brown sugar
– Ground cinnamon
– Crushed Oreo cookies
– Softened butter
1. Mixing the Filling: In a medium bowl, combine the brown sugar, ground cinnamon, and crushed Oreo cookies. Mix until well combined.
2. Incorporate Butter: Melt the softened butter and pour it into the mixture. Stir until the filling is cohesive and can be spread easily over the rolled-out dough. The butter acts as a binding agent, ensuring that all the flavors meld together beautifully.
Creative Variations for the Filling
While the classic combination is delightful, feel free to get creative with the filling! Here are a few suggestions for alternative ingredients or mix-ins:
– Nut Butter: Swirl in some peanut butter or Nutella for an added layer of flavor.
– Chopped Nuts: Add chopped pecans or walnuts for a crunchy texture that complements the softness of the rolls.
– Chocolate Chips: Incorporate chocolate chips for an extra dose of chocolatey goodness.
Rolling and Assembling the Cinnamon Rolls
With your filling ready and dough risen, it’s time to roll out the dough and assemble the cinnamon rolls.
Techniques for Rolling Out the Dough
1. Flouring the Surface: Start by lightly flouring your work surface to prevent the dough from sticking.
2. Roll Out the Dough: Gently punch down the risen dough to release any air bubbles, then transfer it to your floured surface. Using a rolling pin, roll the dough into a rectangular shape, approximately 16×24 inches, ensuring an even thickness throughout.
– Tip: Aim for a thickness of about 1/4 inch, which will allow for generous layers of filling without being too thick to bake evenly.
Assembling the Rolls
1. Spread the Filling: Once your dough is rolled out, evenly spread the prepared filling mixture over the surface, leaving a small border around the edges.
2. Rolling It Up: Starting from one of the long edges, roll the dough tightly into a log. Be gentle but firm to ensure that the filling stays intact.
3. Cutting the Rolls: Use a sharp knife or a bench scraper to cut the rolled dough into 12-15 equal pieces. The cuts should be about 1.5 to 2 inches wide, creating even rolls that will bake uniformly.
As you prepare to bake these delectable cinnamon rolls, the anticipation builds. The aroma of cinnamon, chocolate, and cream filling the air will captivate everyone in your home. The next steps will guide you through baking and glazing your creations for an unforgettable treat that’s just waiting to be savored.
{{image_1}}
Step-by-Step Assembly of the Rolls
Now that you’ve prepared your dough and filling, it’s time to assemble the ooey-gooey Oreo cookies and cream cinnamon rolls. Begin by lightly flouring your work surface to prevent sticking and allow for easier handling of the dough.
1. Rolling Out the Dough: Start by gently rolling out your dough into a rectangular shape, approximately 12×18 inches. Aim for an even thickness of 1/4 inch. This will provide a uniform baking experience and ensure that your filling is distributed evenly.
2. Spreading the Filling: Once the dough is rolled out, spread the prepared cookies and cream filling over the surface. Use a spatula or the back of a spoon to create an even layer, leaving about a half-inch border around the edges. This allows the filling to stay inside the roll when you begin to roll it up.
3. Rolling the Dough: Starting from the long side of the rectangle, carefully roll the dough away from you, maintaining a tight spiral. The tighter the roll, the more swirls you will see in your finished product. Once you reach the end, pinch the seam to seal it properly.
4. Cutting the Rolls: Using a sharp knife or a piece of unflavored dental floss (which works surprisingly well), cut the rolled dough into 12 equal pieces. This technique not only creates cleaner cuts but also helps retain the shape of the rolls.
5. Spacing in the Baking Dish: Place the cut rolls into a greased baking dish, ensuring there is adequate space between each roll. This is crucial because it allows the rolls to expand during the second rise and baking process without merging into each other. Proper spacing results in a better texture and presentation; each roll will have its own distinct shape and crust.
Understanding the Second Rise
The second rise is a vital step in the cinnamon roll-making process. It allows the dough to become airy and light, which enhances the final product’s texture.
– The Science Behind the Second Rise: When the rolls undergo their second rise, the yeast continues to ferment, producing carbon dioxide bubbles that expand the dough. This fermentation process also develops flavor and improves the overall structure of the rolls.
– Benefits of Allowing the Rolls to Rise Again: A proper second rise can lead to fluffier, more tender rolls. Skipping this step can result in dense, heavy rolls that lack the delightful, pillowy texture that everyone loves.
– Creating a Warm Environment for Rising: To encourage a successful second rise, you need to find a warm environment. One effective method is to preheat your oven to 200°F (93°C), then turn it off. Place the covered rolls inside the warm oven, allowing them to rise undisturbed for about 30-45 minutes.
– Ensuring the Rolls Rise Adequately: You can also place the rolls in a sunny spot in your kitchen or cover them with a damp kitchen towel. The key is to keep the dough warm and moist, which will help activate the yeast and promote rising.
Baking the Rolls to Perfection
Once your rolls have completed their second rise, it’s time to bake them to golden perfection.
1. Preheating the Oven: Preheat your oven to 350°F (175°C). A properly preheated oven ensures even cooking and helps achieve that coveted golden-brown finish.
2. Baking Tips: Place the baking dish in the center of the oven for optimal heat distribution. Avoid opening the oven door frequently, as this can cause temperature fluctuations that affect cooking time.
3. Importance of Temperature Control: Maintaining the right temperature is crucial for achieving the desired texture. An oven thermometer can help verify that your oven’s temperature is accurate.
4. Signs of Doneness: The rolls should be golden brown on top, and when gently pressed, they should spring back. Additionally, you can check the internal temperature with a food thermometer; the rolls should reach about 190°F (88°C) when fully baked.
Creating the Cream Cheese Glaze
No cinnamon roll is complete without a decadent glaze. Here’s how to create a smooth cream cheese glaze that perfectly complements your Oreo cookies and cream cinnamon rolls.
1. Step-by-Step Instructions for the Glaze:
– In a mixing bowl, beat 8 oz. of softened cream cheese until smooth.
– Gradually add 2 cups of powdered sugar, mixing until combined.
– Pour in 2-3 tablespoons of milk or heavy cream to achieve your desired consistency. Continue mixing until smooth and creamy.
2. Importance of Using Softened Cream Cheese: Softened cream cheese blends more easily into the glaze, resulting in a lump-free and silky texture. If you forget to set it out beforehand, you can microwave the cream cheese for about 10-15 seconds; just be careful not to overheat it.
3. Customizing the Glaze: You can add flavor variations to the glaze to make it even more special. Consider incorporating a teaspoon of vanilla extract, a splash of almond extract, or even some citrus zest for a refreshing twist.
Glazing and Serving the Rolls
The final step in creating your masterpiece is glazing and serving the rolls.
1. Techniques for Drizzling the Glaze: Once the rolls have cooled slightly, use a spoon or a piping bag to drizzle the cream cheese glaze over them. You can create a beautiful, artistic pattern by moving your hand in a zigzag motion.
2. Achieving an Artistic Presentation: For a more refined look, you can use a squeeze bottle filled with glaze to control the flow. This makes it easier to create intricate designs.
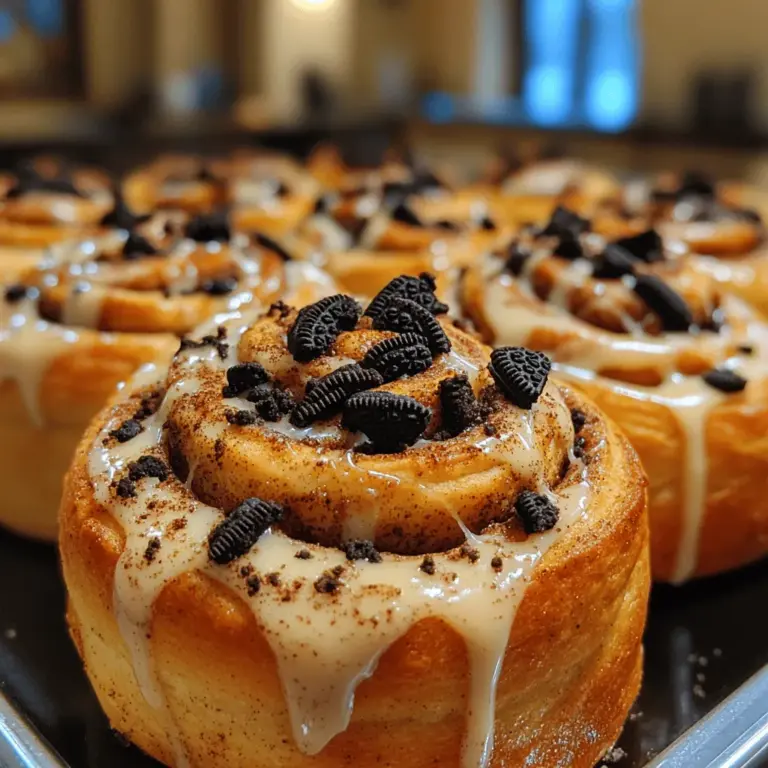
3. Ideas for Garnishing: To elevate the visual appeal, consider garnishing with crushed Oreos or a sprinkle of chocolate shavings. This not only adds texture but also enhances the dessert’s theme, making it even more enticing.
Conclusion
Creating these Oreo cookies and cream cinnamon rolls is not only a delightful baking experience but also a joy to share with friends and family. The combination of soft, fluffy rolls filled with creamy cookies and topped with a luscious glaze makes for an indulgent treat that is sure to impress.
Baking is as much about the process as it is about the final product. Enjoy the communal experience of gathering around a warm batch of homemade rolls, sharing stories, and creating memories. Don’t hesitate to embrace your creativity in the kitchen—experiment with flavors, try different fillings, and make this recipe your own. Happy baking!

