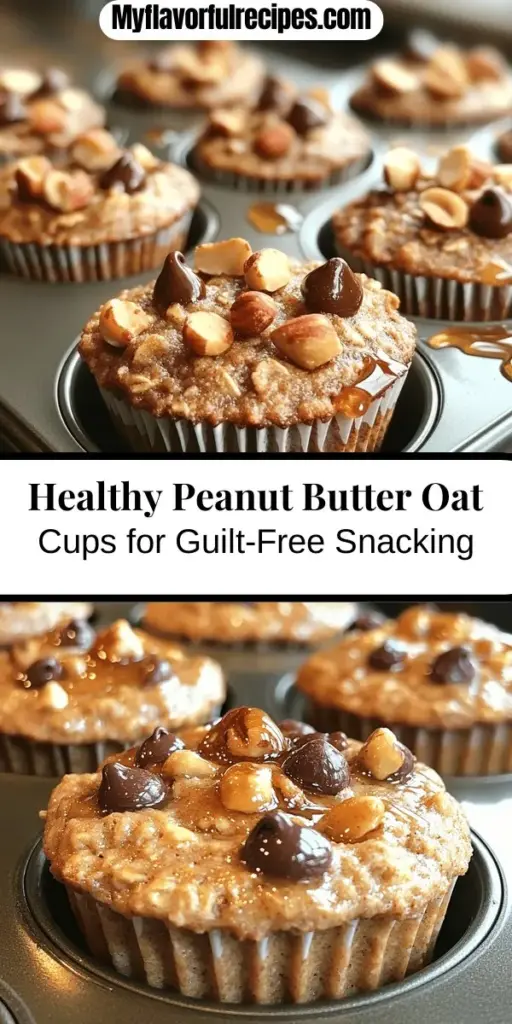
Introduction
In today’s fast-paced world, finding healthy yet satisfying snacks can feel like a daunting task. Enter the irresistible peanut butter oat cups: a delightful fusion of flavor, nutrition, and convenience that can easily become a staple in your kitchen. These oat cups are not only delicious but also versatile, making them an excellent choice for breakfast, an afternoon pick-me-up, or even a guilt-free dessert. With just a few simple ingredients and minimal preparation, you can whip up a batch of these oat cups in no time, ensuring you always have a healthy snack on hand.
Healthy snacking is more important than ever, especially as people become increasingly aware of the impact of their food choices on overall well-being. Peanut butter oat cups provide a perfect balance of carbohydrates, protein, and healthy fats, all while being easy to prepare. This recipe appeals to various dietary preferences and can be tailored to suit your specific needs. Whether you are vegan, gluten-free, or simply looking for a nutritious option, these oat cups can be adapted to fit seamlessly into your lifestyle.
The Allure of Peanut Butter Oat Cups
Peanut butter oat cups have surged in popularity among health-conscious individuals and busy families alike. The main ingredient, oats, is celebrated for its numerous health benefits, making it a staple in many diets. Oats are rich in dietary fiber, which aids digestion and helps to maintain steady energy levels throughout the day. They are also a good source of essential vitamins and minerals, including iron, magnesium, and B vitamins, making them a powerful addition to your meals.
Peanut butter, the star of this recipe, is not just a tasty spread; it’s also packed with nutrients that contribute to a balanced diet. Rich in healthy fats, protein, and various vitamins, peanut butter can help keep you feeling full and satisfied. The combination of oats and peanut butter creates a nutrient-dense snack that’s perfect for fueling your day.
What makes these oat cups particularly appealing is their adaptability. You can easily modify the recipe to suit different dietary preferences. For those who are gluten-sensitive, simply opt for gluten-free oats, ensuring that everyone can enjoy these delicious treats. Whether you follow a vegetarian, vegan, or gluten-free diet, peanut butter oat cups seamlessly fit into your meal plan.
Ingredients Breakdown
To create these delightful peanut butter oat cups, you’ll need a handful of simple ingredients that pack a nutritional punch. Here’s a detailed breakdown of each ingredient and its role in the recipe:
Rolled Oats
Rolled oats serve as the foundation of this recipe, providing a hearty texture and a source of energy. They are packed with soluble fiber, which helps to lower cholesterol levels and regulate blood sugar. The fiber in oats also promotes a feeling of fullness, making these oat cups a satisfying snack option.
Natural Peanut Butter
Natural peanut butter is the star ingredient in this recipe, adding creaminess and a dose of healthy fats. It contains monounsaturated and polyunsaturated fats, which are beneficial for heart health. Additionally, peanut butter is a great source of protein, helping to keep you energized throughout the day. Look for peanut butter with minimal ingredients—ideally just peanuts and salt—to maximize the health benefits.
Honey or Maple Syrup
To sweeten the oat cups, you can use honey or maple syrup, both of which are natural sweeteners with their own health benefits. Honey has antibacterial properties and can soothe a sore throat, while maple syrup is rich in antioxidants and minerals like zinc and manganese. Both options add a touch of sweetness without the refined sugars found in many processed snacks.
Brown Sugar
Adding a bit of brown sugar enhances the depth of flavor in your peanut butter oat cups. It provides a slight caramel taste that complements the nuttiness of the peanut butter. While brown sugar is still a form of sugar, using it in moderation can contribute to a balanced diet when paired with nutritious ingredients.
Milk
Milk serves as a binding agent in the recipe, helping to create a cohesive mixture. You have the flexibility to use dairy milk or non-dairy alternatives, such as almond milk, oat milk, or coconut milk. This versatility allows you to cater to various dietary needs while still achieving the desired texture and flavor in your oat cups.
Flavor Enhancers
To elevate the flavor profile of your oat cups, a few simple flavor enhancers are included. Vanilla extract adds a warm, sweet aroma, while a pinch of salt balances the flavors. Cinnamon not only provides a hint of spice but also boasts anti-inflammatory properties and can help regulate blood sugar levels.
Chocolate Chips
For those who enjoy a touch of indulgence, chocolate chips are a fantastic addition. They add a delightful sweetness and richness to the oat cups, making them feel like a treat. You can use dark chocolate chips for a healthier option, which contain less sugar and more antioxidants compared to regular chocolate.
Optional Nuts
If you’re looking to add an extra crunch and boost the nutritional content, consider incorporating optional nuts into the mixture. Chopped walnuts, almonds, or pecans can enhance the flavor and provide additional healthy fats and protein.
Step-by-Step Instructions
Now that you have gathered all the ingredients, it’s time to start preparing your irresistible peanut butter oat cups. The first step in any baking process is crucial: preheat your oven.
Preheating the Oven
Preheating the oven is an essential step in baking that ensures even cooking. When you place your mixture into a preheated oven, it helps to create a uniform texture and allows your oat cups to rise properly. Set your oven to 350°F (175°C) and give it ample time to reach the desired temperature before you bake your oat cups.
Prepare the Baking Dish
While the oven is preheating, prepare your baking dish. A muffin tin is ideal for creating perfectly portioned oat cups. Grease the muffin tin with a bit of cooking spray or line it with paper liners to prevent sticking. This step will make removing the oat cups much easier once they are baked.
Mix the Ingredients
In a large mixing bowl, combine the rolled oats, natural peanut butter, honey or maple syrup, brown sugar, and milk. Stir until all the ingredients are well incorporated. The mixture should be thick but cohesive, with the oats evenly coated in the wet ingredients. If you prefer a sweeter taste, feel free to adjust the amount of honey or maple syrup according to your preference.
Add Flavor Enhancers
Once the base mixture is ready, add the vanilla extract, a pinch of salt, and a generous sprinkle of cinnamon. These flavor enhancers will elevate the taste of your oat cups, creating a deliciously aromatic snack. Mix everything together until the added ingredients are well distributed throughout the mixture.
Fold in Chocolate Chips and Nuts
For the final touch, gently fold in the chocolate chips and any optional nuts you choose to include. This step adds a delightful surprise of flavor and texture in every bite. Be careful not to overmix; you want the chocolate and nuts to be evenly distributed without breaking them down.
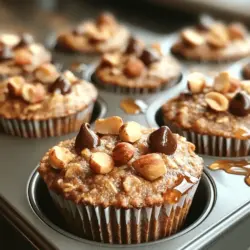
With the ingredients combined, you are now ready to portion the mixture into your prepared muffin tin. Fill each muffin cup about three-quarters full to allow for some rising during baking. Once filled, smooth the tops of the oat cups for an even appearance.
As you prepare to place them in the oven, take a moment to admire your creation. Not only are these peanut butter oat cups easy to make, but they also promise to be a delicious and nutritious addition to your snacking repertoire.
Stay tuned for the next steps where we will cover the baking process and some tips to ensure your oat cups turn out perfectly every time!
{{image_1}}
Mixing Wet Ingredients: Techniques for Achieving a Smooth Consistency
To create the perfect base for your Irresistible Peanut Butter Oat Cups, start by mixing the wet ingredients. This typically includes peanut butter, honey (or another sweetener), and any additional liquids such as almond milk or coconut milk. To achieve a smooth consistency, consider the following techniques:
1. Room Temperature Ingredients: Ensure that your peanut butter is not just fresh but at room temperature. If it’s too cold, it will be harder to blend smoothly with other ingredients. If necessary, microwave it for a few seconds to soften.
2. Use a Whisk or Electric Mixer: A whisk can do wonders for blending, but if you want a super-smooth mixture, an electric mixer is your best friend. Start on a low setting to combine the ingredients, then increase to medium speed until fully incorporated.
3. Gradual Addition: When adding liquids, do so gradually while continuously mixing. This method helps to prevent clumping and ensures all ingredients are well combined.
Combining Dry Ingredients: Tips for Ensuring Proper Mixing
Once your wet mixture is ready, it’s time to combine it with the dry ingredients. This usually includes oats, flour (if using), baking powder, and any spices you might want to add. Here are some best practices for ensuring proper mixing:
1. Sift Dry Ingredients: If using flour or cocoa powder, sift them together with oats and baking powder. This aerates the mixture and helps avoid lumps.
2. Mix in a Separate Bowl: Combine your dry ingredients in a separate bowl before adding them to the wet mixture. This ensures an even distribution of baking powder and any spices, resulting in a consistent flavor throughout.
3. Avoid Overmixing: When you combine the wet and dry mixtures, mix just until everything is combined. Overmixing can lead to tough oat cups, so aim for a batter that is slightly lumpy.
Folding Techniques to Maintain Texture
When it comes to incorporating the wet and dry mixtures, folding is key. This gentle technique helps maintain the integrity of the oats while ensuring even distribution of ingredients.
1. Use a Spatula: A rubber spatula is ideal for this task. It allows you to scrape down the sides of the bowl and lift the mixture without deflating it.
2. Turn and Fold: Instead of stirring in a circular motion, turn the spatula and fold the mixture over itself. Repeat until just combined, being careful not to crush the oats.
Filling the Muffin Tin: Portion Control and Presentation Tips
Now that your batter is ready, it’s time to fill your muffin tin. Portion control and presentation are essential for ensuring even baking and appealing oat cups.
1. Use an Ice Cream Scoop: This tool provides the perfect portion size and helps in maintaining uniformity. Fill each muffin cup about three-quarters full, leaving space for the cups to rise.
2. Grease or Line the Muffin Tin: To make the oat cups easier to remove, consider greasing the muffin tin with cooking spray or lining it with muffin liners. If using liners, you can also choose decorative ones to enhance presentation.
3. Tap the Tin: Once filled, gently tap the muffin tin on the counter. This helps to settle the batter and remove any air bubbles, leading to better texture after baking.
Baking Process: How to Tell When They Are Done
Baking your peanut butter oat cups is a critical step. The baking time generally ranges from 15 to 20 minutes, but there are ways to tell when they are done:
1. Golden Brown Edges: Look for a golden-brown color on the edges. This indicates that the oat cups are baked properly.
2. Toothpick Test: Insert a toothpick into the center of one of the oat cups. If it comes out clean or with a few moist crumbs, they are ready. If it’s wet with batter, give them a few more minutes.
3. Slightly Firm to the Touch: When gently pressed, the tops should spring back. If they feel too soft, they need more time in the oven.
Cooling Process: Importance of Cooling for Texture and Flavor
Once your oat cups are baked to perfection, it’s vital to let them cool properly. Cooling not only improves texture but also enhances flavor development.
1. Remove from Oven: Allow the muffin tin to cool on a wire rack for about 10 minutes. This prevents the bottoms from becoming soggy.
2. Transfer to Wire Rack: After 10 minutes, gently remove the oat cups from the muffin tin and place them on a wire rack. This step is crucial as it allows air to circulate around them, preventing moisture build-up.
3. Cool Completely: Let the oat cups cool completely before serving or storing. This ensures they hold their shape and flavors meld together beautifully.
Serving Suggestions
Your Irresistible Peanut Butter Oat Cups are now ready to be enjoyed! Here are some creative serving suggestions to elevate your experience:
1. Toppings: Drizzle additional honey or maple syrup on top for added sweetness. You could also sprinkle with chopped nuts, coconut flakes, or chocolate chips for extra texture and flavor.
2. Pairings: These oat cups pair perfectly with yogurt, fresh fruit, or a dollop of nut butter. Serve them alongside a smoothie or a cup of coffee for a wholesome breakfast or snack.
3. Meal Planning: Incorporate oat cups into your weekly meal prep. They make for a convenient on-the-go breakfast or a healthy snack option during the day. Store them in individual containers for easy access.
Storage Tips: How to Keep Them Fresh and Maintain Texture
To enjoy your oat cups for days to come, proper storage is key:
1. Room Temperature: If you plan to eat them within a few days, store the oat cups in an airtight container at room temperature. They should stay fresh for up to 3 days.
2. Refrigeration: For longer storage, keep them in the fridge where they can last up to a week. Just be aware that refrigeration may change their texture slightly.
3. Freezing: For even longer preservation, freeze the oat cups. Wrap each one individually in plastic wrap or foil and place them in a freezer-safe bag. They can last up to 3 months. Thaw them overnight in the refrigerator before enjoying.
Nutritional Analysis
Understanding the nutritional benefits of your Irresistible Peanut Butter Oat Cups can help you appreciate their value as a snack option. Here’s a breakdown:
1. Calories and Macronutrients: Each oat cup contains approximately 150 calories, with about 5g of protein, 6g of healthy fats, and 20g of carbohydrates. This makes them a balanced snack option.
2. Comparison with Other Snacks: Unlike traditional granola bars or store-bought snacks, which can be high in added sugars and preservatives, homemade oat cups provide a wholesome alternative. They are packed with whole grains and healthy fats, making them more satisfying.
3. Portion Sizes and Mindful Eating: With a serving size of one oat cup, you can easily control your portion. Pairing them with protein-rich foods like yogurt can further enhance satiety, promoting mindful eating.
Variations and Customizations
Your Irresistible Peanut Butter Oat Cups can be easily customized to fit your dietary preferences and taste:
1. Ingredient Substitutions: If you have nut allergies, try substituting peanut butter with almond or sunflower seed butter. For a lower-calorie option, consider using unsweetened applesauce instead of honey.
2. Flavor Variations: To add excitement, experiment with flavor variations. Fold in dried fruits like cranberries or raisins, or add spices such as cinnamon or vanilla extract for a warm, inviting flavor.
3. Dietary Needs: To make the recipe vegan, substitute honey with maple syrup. For a nut-free option, select seed butters and ensure your oats are gluten-free if necessary.
Conclusion
Making Irresistible Peanut Butter Oat Cups offers a simple yet rewarding culinary experience. From their delightful texture to their nutritional benefits, these oat cups provide a fantastic snack or breakfast option for anyone looking to incorporate healthier choices into their diet.
Not only are they easy to prepare, but they can also be customized to suit various dietary needs and preferences. Encourage yourself to try this recipe and enjoy the versatility and convenience these oat cups bring to your everyday life. Whether you’re rushing out the door or looking for a quick pick-me-up, these oat cups are sure to become a staple in your kitchen.