Delightful Pastel Halloween Treats Bites: A Sweet Celebration
As the leaves turn and a chill fills the air, Halloween emerges as a vibrant celebration filled with creativity, costumes, and, most importantly, treats. This festive occasion invites everyone—young and old—to indulge in the spirit of fun, often leading to imaginative cooking and baking adventures. One such delightful creation is the Pastel Halloween Treats Bites, a colorful, easy-to-make snack that brings a whimsical touch to any Halloween gathering. These treats not only satisfy sweet cravings but also add a festive flair that brightens up the holiday spirit.
Pastel Halloween Treats Bites are the perfect addition to your Halloween festivities. Their playful colors and delightful textures appeal to children, while their simplicity makes them a great choice for adults looking to add a touch of sweetness to their celebrations. Whether you’re hosting a Halloween party, attending a potluck, or simply looking to create something fun with the family, these treats are a fantastic way to embrace the season. Plus, they are quick to prepare, allowing for more time to enjoy the holiday’s numerous activities.
Understanding the Ingredients
To create these delightful bites, it’s essential to understand the key ingredients that contribute to their flavor and visual appeal. Each component plays a vital role in not just the taste but also the overall aesthetic of the treats.
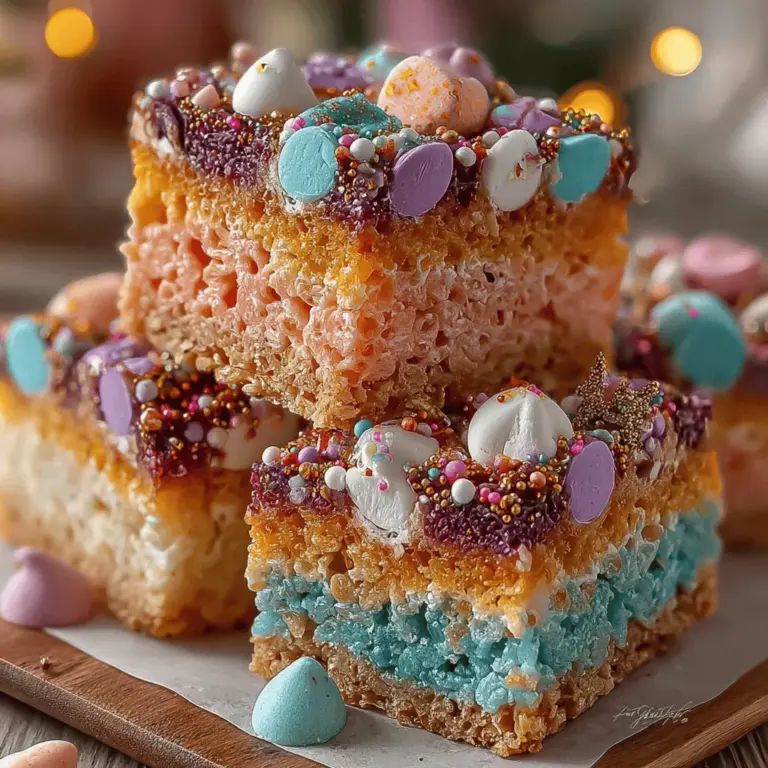
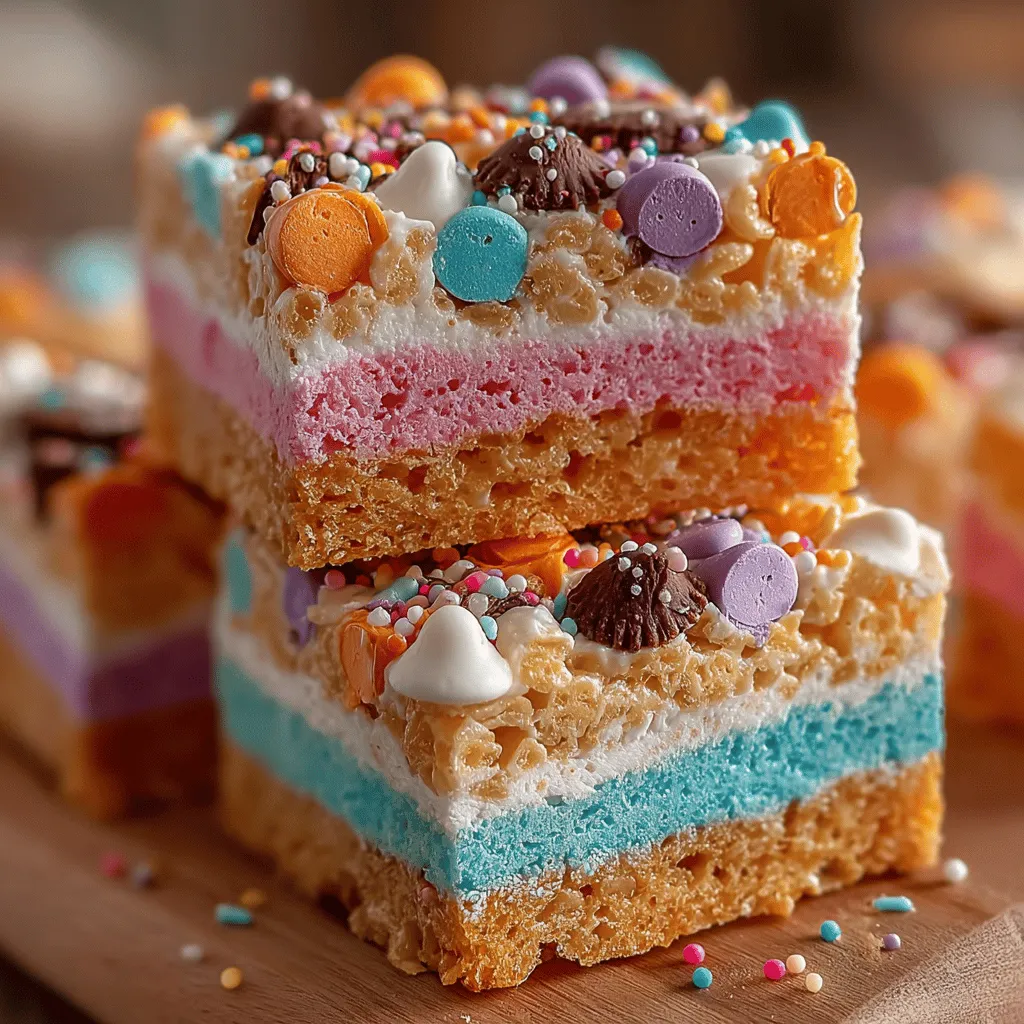
1. Pastel-Colored Rice Cereal: The foundation of these treats, pastel rice cereal adds both crunch and a soft, chewy texture. Its light colors are perfect for Halloween, bringing a fun and festive vibe that contrasts sharply with the traditional dark themes often associated with the holiday. The pastel hues invite creativity, making each bite a piece of edible art.
2. Mini Marshmallows: These tiny puffs of sweetness are crucial for achieving the chewy texture that makes these treats so enjoyable. When melted, mini marshmallows create a gooey, sticky base that holds the rice cereal together. Their sweetness enhances the overall flavor profile, balancing the crunch of the cereal with a soft, pillowy bite.
3. Pastel Chocolate Chips: The addition of pastel chocolate chips not only enhances the flavor but also adds a visual pop to the treats. These chips melt slightly when mixed into the warm cereal and marshmallow mixture, creating delightful pockets of chocolate that elevate each bite. Their vibrant colors tie in beautifully with the overall pastel theme, making the treats visually appealing to both kids and adults.
4. Butter: A staple in many dessert recipes, butter contributes rich flavor and helps create a smooth mixture when combined with melted marshmallows. Its fat content ensures that the treats have a satisfying texture, making them even more enjoyable to eat. Properly melted butter is key to preventing any separation or burning during the preparation process.
5. Vanilla Extract: While it may seem like a minor ingredient, vanilla extract has a significant impact on the overall taste of the treats. It adds a warm, aromatic flavor that complements the sweetness of the chocolate and marshmallows, enhancing the treat’s overall profile. A splash of vanilla can transform a simple recipe into a memorable one.
6. Halloween-Themed Sprinkles and Optional Edible Glitter: To finish off these treats, a sprinkle of Halloween-themed decorations adds the perfect touch. Sprinkles come in various shapes and colors, from ghosts to pumpkins, making them an ideal way to enhance the festive appeal. Edible glitter can also be added for those who want to take their treats to the next level, creating a magical sparkle that is sure to catch the eye.
Step-by-Step Preparation
Now that we have a solid understanding of the ingredients, let’s dive into the preparation process. The following steps will guide you through creating your own Pastel Halloween Treats Bites, ensuring a fun and successful baking experience.
Preparing the Baking Dish
Before you begin mixing ingredients, it’s crucial to prepare your baking dish. Greasing the dish is an essential step that prevents the treats from sticking, ensuring that they come out easily once set. You can use butter or non-stick cooking spray to coat the bottom and sides of the dish. A 9×13 inch baking pan works well for this recipe, providing ample space for your treats to set evenly.
Melting the Butter
Next, it’s time to melt the butter. Place the butter in a medium saucepan over low to medium heat. Stir continuously to avoid burning, as butter can quickly go from melted to browned if left unattended. Once melted, add the mini marshmallows to the pan. Continue stirring gently until the marshmallows are completely melted and smoothly combined with the butter. This step is crucial for achieving a uniform mixture that will coat the rice cereal effectively.
Adding Flavor
Once the butter and marshmallows are melted together, it’s time to enhance the flavor with vanilla extract. Remove the pan from heat and stir in the vanilla. This addition will infuse the mixture with a warm, inviting aroma that elevates the overall taste of your treats. Make sure to mix well, ensuring that the vanilla is evenly distributed throughout the melted marshmallow mixture.
Incorporating the Cereal
Now comes the fun part—incorporating the pastel-colored rice cereal. Add the cereal to the melted marshmallow mixture in batches, stirring gently to ensure that each piece is evenly coated. It’s important to be gentle during this process to avoid crushing the cereal. The goal is to achieve a well-mixed, sticky consistency that binds the cereal together without losing its texture.
Combining Chocolate Chips
Once the rice cereal is fully coated, it’s time to fold in the pastel chocolate chips. This step should be done carefully; you want to maintain the shape of the chocolate chips while ensuring they are evenly distributed throughout the mixture. Use a spatula to gently fold the chocolate chips into the cereal mixture, allowing them to become slightly melty from the warmth but not completely dissolved.
As you complete these steps, you will have a colorful and enticing mixture ready to be transformed into delightful Pastel Halloween Treats Bites. Stay tuned for the next part of this article, where we will discuss how to finalize your treats and add the finishing touches for a visually stunning Halloween snack!
Adding Sprinkles
One of the most exciting aspects of making Pastel Halloween Treats Bites is the opportunity for creative decoration. Adding sprinkles not only enhances the visual appeal of your treats but also adds a delightful crunch. To achieve a beautiful balance, consider mixing some sprinkles directly into the treat mixture before pressing it into the dish. This will ensure that every bite contains a hint of color and sweetness.
When selecting sprinkles, opt for a variety that complements your pastel theme—think pastel-colored jimmies, nonpareils, or even themed Halloween shapes like ghosts or pumpkins. The combination of colors will create a visually captivating treat that is perfect for the festive season.
Pressing into the Dish
The technique you use to press your mixture into the dish plays a crucial role in the final texture of your Pastel Halloween Treats Bites. It’s essential to create a firm and even layer to ensure they hold together well once cut. Start by lightly greasing your dish with cooking spray or lining it with parchment paper for easy removal.
Use your hands or a spatula to gently press the mixture into the dish, ensuring it is spread evenly. Avoid over-compacting the mixture, as this can lead to a dense texture that may not be as enjoyable to eat. A light, even pressure will help maintain a chewy consistency, allowing the bites to have the perfect “snap” when you take a bite.
Decorating
Once your treats have set, it’s time to elevate their appearance with some fun decorations. Get creative with your sprinkles—consider using edible glitter for added sparkle or themed toppers like candy eyes or plastic spiders to enhance the Halloween spirit. You can also melt some white chocolate and drizzle it over the top for a beautiful contrast against the pastel colors.
Another idea is to create a themed layer by alternating colors in the mixture. For example, you could create a layer of pastel orange followed by a layer of pastel purple, then top it with a sprinkling of seasonal decorations. This not only makes for a visually stunning treat but also adds an element of surprise and delight for those who take a bite.
Setting and Chilling
Setting and chilling are critical steps in the preparation of your Pastel Halloween Treats Bites. After decorating, cover the dish with plastic wrap and place it in the refrigerator for at least an hour. This cooling period allows the mixture to firm up, making it easier to cut into shapes later on. The chilling process also enhances the flavors, allowing them to meld together beautifully.
Once chilled, you’ll notice the texture has transformed into a perfect chewy bite that holds its shape when cut. If time permits, letting them chill overnight can further improve their taste and texture.
Cutting and Serving
After your treats have set, it’s time to cut and serve them. Use a sharp knife to slice the mixture into squares, rectangles, or fun shapes using cookie cutters. For a Halloween-themed twist, try cutting them into bats, pumpkins, or even ghosts. The fun shapes will not only make them more appealing but will also delight your guests, especially children.
When serving, consider placing your Pastel Halloween Treats Bites on a decorative platter. You can create a spooky-themed display by placing them on a black or orange plate and garnishing with additional sprinkles or Halloween candies. To make the experience even more festive, pair your treats with Halloween-themed drinks, such as a spooky punch or pumpkin spice lattes.
Nutritional Information and Serving Suggestions
While these Pastel Halloween Treats Bites are a delightful indulgence, it’s essential to consider their nutritional aspects. Each treat contains a balance of ingredients, including sweetened cereals, which provide energy, and can be made with lower-sugar options or substitute ingredients to cater to dietary preferences.
For serving suggestions, consider creating a themed platter with an assortment of Halloween treats. Incorporating fruits like ghost-shaped bananas or apple slices can add a healthy touch to your dessert table. Pairing these bites with drinks like apple cider or a fun Halloween smoothie can also enhance the festive atmosphere.
The versatility of this recipe means you can customize it for various holidays. Simply change the colors of your sprinkles or decorations to match different themes—think red and green for Christmas or pink and red for Valentine’s Day. This adaptability makes the treats a fun option for any celebration.
Why These Treats are Perfect for Halloween
Pastel Halloween Treats Bites are a perfect fit for the Halloween season due to their colorful and festive appearance. The combination of pastel colors evokes a sense of whimsy and fun, appealing to both children and adults alike. Furthermore, the simplicity of the recipe allows cooks of all ages to participate in the preparation, making it an excellent family activity.
Preparing these treats in advance is another significant advantage, especially for gatherings or parties. You can make them ahead of time, freeing you up to enjoy the festivities without the stress of last-minute baking. The fun factor is heightened when children are involved in the kitchen, allowing them to unleash their creativity while helping to mix, press, and decorate.
Conclusion
Making and enjoying Pastel Halloween Treats Bites is an enchanting way to celebrate the Halloween season. The combination of colorful decorations, simple preparation, and delightful flavors brings joy to both the cook and those who indulge in these festive treats. Embrace your creativity in the kitchen, and don’t hesitate to experiment with different variations and decorations to make this recipe your own.
As we gather with friends and family during this magical time of year, let’s remember the importance of food in fostering community and shared experiences. Encourage your loved ones to join in the fun of creating these delightful bites and share your own variations of this recipe with others. Happy Halloween!

