Choco-Banana Dream Bars Recipe
Introduction
Dessert bars have captured the hearts of sweet-tooths and health enthusiasts alike, thanks to their convenience and versatility. Whether you’re hosting a gathering, packing a lunch, or simply indulging in a late-night snack, dessert bars offer a perfect portion of sweetness without the mess of traditional cakes or pastries. Among the myriad of options available, the Choco-Banana Dream Bars stand out as a delightful blend of health and indulgence.
These bars are not just a treat for the taste buds; they also bring a nutritious twist to the dessert table. Comprising wholesome ingredients like ripe bananas, creamy peanut butter, and rich dark chocolate, these bars are a testament to how deliciously healthy desserts can be. In this article, you’ll discover how to make Choco-Banana Dream Bars with a step-by-step guide that includes nutritional insights and essential storage tips to keep your treats fresh and ready to enjoy.
The Appeal of Choco-Banana Dream Bars
The combination of chocolate and banana is a match made in heaven. The natural sweetness of ripe bananas pairs beautifully with the rich, slightly bitter notes of dark chocolate, creating a flavor profile that is both satisfying and rich. Each bite of these Choco-Banana Dream Bars delivers a delightful balance of sweetness and depth, making them a favorite among dessert lovers.
In addition to their delicious flavor, the texture of these bars is a key component of their appeal. The creamy consistency of peanut butter blends seamlessly with the chewy oats, creating a satisfying mouthfeel that keeps you coming back for more. This contrast between the smoothness of the peanut butter and the hearty texture of oats ensures that every bite is a delightful experience.
What sets Choco-Banana Dream Bars apart is their commitment to using wholesome ingredients. By opting for nutrient-dense components, you can indulge without the guilt commonly associated with traditional desserts. These bars not only satisfy your sweet cravings but also provide a range of health benefits, making them an excellent addition to your healthy eating repertoire.
Health Benefits of Key Ingredients
1. Ripe Bananas: The star ingredient in Choco-Banana Dream Bars, ripe bananas are not only delicious but also packed with nutrients. They are an excellent source of potassium, which is essential for heart health and proper muscle function. Additionally, bananas are rich in dietary fiber, aiding in digestion and promoting a feeling of fullness.
2. Peanut Butter: Known for its creamy texture and nutty flavor, peanut butter is a powerhouse of healthy fats and protein. Incorporating peanut butter into your diet can enhance satiety, making you feel full longer and reducing the likelihood of unhealthy snacking. Furthermore, it contains vitamins and minerals, such as vitamin E and magnesium, that contribute to overall wellness.
3. Dark Chocolate: Not all chocolates are created equal. Dark chocolate, especially varieties with a high cocoa content, is rich in antioxidants that combat oxidative stress in the body. Additionally, dark chocolate has been linked to improved mood and cognitive function, making it a delightful indulgence that can also uplift your spirits.
4. Oats and Almond Flour: These wholesome ingredients provide a solid foundation for the bars. Oats are a fantastic source of whole grains, offering a range of nutrients including fiber, iron, and B vitamins. They are also known for their heart-healthy properties. Almond flour, on the other hand, is a gluten-free alternative that adds a nutty flavor and extra protein to the recipe, making these bars suitable for a variety of dietary needs.
5. Honey/Maple Syrup: To enhance the natural sweetness of the bars, using honey or maple syrup is a great choice. These natural sweeteners not only add flavor but also come with their own health benefits. Honey has antimicrobial properties and can soothe sore throats, while maple syrup is rich in antioxidants and has a lower glycemic index compared to refined sugars, making it a better option for maintaining stable blood sugar levels.
Step-by-Step Instructions for Making Choco-Banana Dream Bars
Now that we’ve established the allure and health benefits of Choco-Banana Dream Bars, let’s dive into the preparation process. The first step is to create the base of the bars, which is crucial for achieving the perfect texture and flavor.
Preparing the Base
Begin by gathering your ingredients, which should include ripe bananas, oats, peanut butter, dark chocolate, almond flour, and either honey or maple syrup. The bananas should be well-ripened, as their natural sugars will enhance the sweetness of the bars.
1. Mashing the Bananas: Take 2-3 ripe bananas and place them in a mixing bowl. Using a fork or a potato masher, thoroughly mash the bananas until they reach a smooth, creamy consistency. This step is important because well-mashed bananas integrate better into the mixture, ensuring a uniform texture throughout the bars.
2. Mixing in the Peanut Butter: Once the bananas are mashed, add in about 1 cup of creamy peanut butter. The peanut butter not only adds flavor but also helps bind the ingredients together, creating a cohesive base. Mix the two ingredients until they are completely combined, forming a thick and creamy mixture.
3. Incorporating Dry Ingredients: Next, you will add the dry ingredients. Gradually mix in 1 cup of oats, ½ cup of almond flour, and a pinch of salt. The oats provide a chewy texture, while the almond flour enhances the nutritional profile. Stir until all the dry ingredients are fully incorporated into the banana-peanut butter mixture.
4. Sweetening the Mixture: To sweeten your base, add in ¼ cup of honey or maple syrup, depending on your preference. This will not only enhance the sweetness but also contribute to the overall moisture of the bars. Mix well to ensure the sweetener is evenly distributed throughout the mixture.
5. Adding Dark Chocolate: Finally, chop up ½ cup of dark chocolate into small pieces and fold them into the mixture. This will add delightful pockets of chocolate throughout the bars, making every bite a little indulgent.
With the base prepared, you are now ready to transfer the mixture into a baking dish and continue the process of creating your Choco-Banana Dream Bars. Stay tuned for the next steps, where we will guide you through the baking process and how to achieve the perfect finish for these delectable treats.
Adding Dry Ingredients
Achieving the perfect consistency for your Choco-Banana Dream Bars relies heavily on the right combination of dry ingredients. Start by measuring out your oats and almond flour accurately. For this recipe, you will need 1 ½ cups of rolled oats and 1 cup of almond flour. The oats provide structure and chewiness, while almond flour adds moisture and a subtle nutty flavor.
To ensure an even distribution, mix the dry ingredients in a large bowl before incorporating them into the wet mixture. Stir the oats and almond flour together until thoroughly combined, which will help prevent clumping and ensure that every bite of your bars has that delightful texture. If you prefer a slightly finer texture, you can blend the rolled oats in a food processor for a few seconds before adding them to the mixture.
The key to a successful bar is balancing these dry ingredients with the wet components. If your mixture feels too dry, consider adding a tablespoon of non-dairy milk to achieve the desired consistency, which should be moist but not overly sticky.
Melting the Chocolate
Melting chocolate might seem straightforward, but it requires careful attention to prevent burning. For this recipe, you will need 1 cup of dairy-free chocolate chips. The best method for melting chocolate is using a double boiler, which gently heats the chocolate, allowing it to melt evenly.
To set up a double boiler, fill a small pot with water and bring it to a simmer. Place a heatproof bowl over the pot, ensuring it doesn’t touch the water. Add the chocolate chips to the bowl, stirring frequently until they melt into a smooth, glossy consistency. This method helps to maintain the integrity of the chocolate and prevents it from seizing. Alternatively, you can use the microwave: place the chocolate chips in a microwave-safe bowl and heat in 30-second intervals, stirring in between until melted.
Once your chocolate is melted, remove it from heat and allow it to cool slightly before using it in your recipe. This will help prevent it from becoming too thick when combined with the other ingredients.
Assembling the Layers
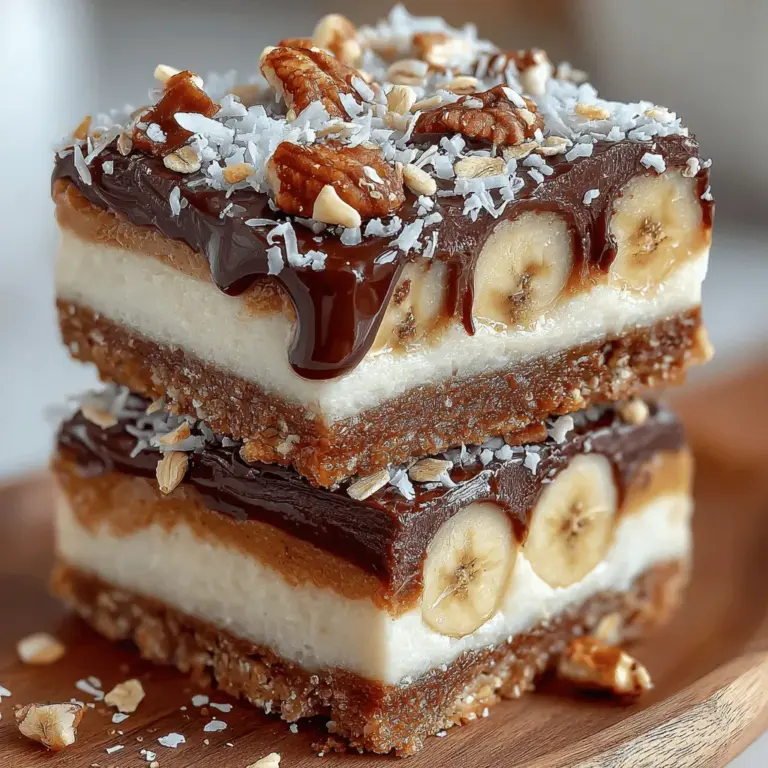
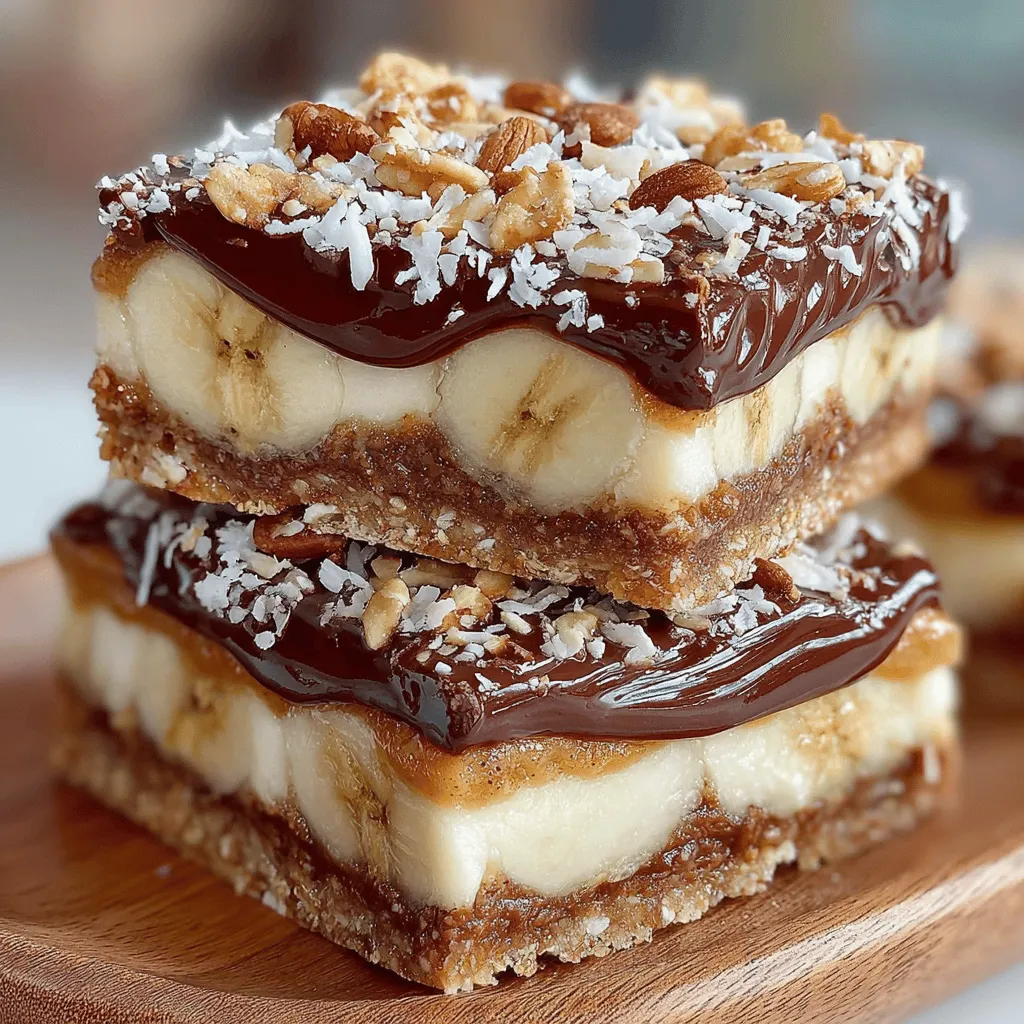
Assembling your Choco-Banana Dream Bars is where the magic happens. Begin by preparing a baking dish lined with parchment paper, allowing for easy removal once they are set. Spread half of the banana mixture on the bottom of the dish, creating an even layer. Use a spatula to gently press it down, ensuring there are no air pockets.
Next, pour the melted chocolate over the banana layer, spreading it evenly with the spatula to cover the entire surface. This layer not only adds richness but also acts as a barrier, keeping the bottom layer moist. Follow this by adding the remaining banana mixture on top of the chocolate. Again, use your spatula to spread it evenly, taking care not to disturb the chocolate layer below.
To create a beautiful layered effect, you can use a toothpick to swirl the chocolate slightly into the banana mixture, giving it a marbled look. This step is optional, but it adds a visually appealing touch to your bars.
Adding Toppings
To elevate your Choco-Banana Dream Bars, consider adding toppings before freezing. A sprinkle of chopped nuts, such as walnuts or pecans, adds a delightful crunch and nuttiness. You can also add shredded coconut for a tropical twist or a dash of sea salt to enhance the chocolate flavor. For a more decadent treat, drizzle additional melted chocolate over the top before placing it in the freezer.
Feel free to get creative with your toppings — the versatility of this recipe allows you to customize it according to your preferences. Don’t hesitate to experiment with different nut butters or seeds, as they can complement the overall flavor profile beautifully.
Freezing
Freezing is a crucial step in achieving the perfect consistency for your Choco-Banana Dream Bars. Once assembled, cover the dish with plastic wrap or foil and place it in the freezer for at least 2 hours. This allows the bars to firm up, making them easier to cut and handle.
The science behind freezing is that it helps solidify the fats within the bars, creating a texture that is both chewy and firm, yet still easy to bite into. If you find that the bars are too soft after the initial freezing period, allow them to set for an additional hour. This step ensures that your bars retain their shape when cut and served.
Cutting and Serving
Once your bars are fully frozen, it’s time to cut them into perfect squares or rectangles. Using a sharp knife, carefully slice through the layers, wiping the knife clean between cuts for a neat finish. You can cut them into bite-sized pieces for a snack or larger portions for a dessert.
For serving suggestions, consider pairing these bars with a dollop of almond yogurt or a scoop of dairy-free ice cream. They also pair beautifully with fresh fruit, such as strawberries or blueberries, adding a pop of color and freshness to your presentation. For an elegant touch, serve them on a platter garnished with mint leaves or a dusting of cocoa powder.
Nutritional Breakdown of Choco-Banana Dream Bars
When it comes to nutrition, Choco-Banana Dream Bars offer a well-rounded profile. Each bar contains approximately 200 calories, 10 grams of fat, 25 grams of carbohydrates, and 4 grams of protein. This makes them a satisfying snack to fuel your day without the guilt associated with traditional dessert bars.
These bars fit well into various dietary lifestyles, including vegan and gluten-free options. By using almond flour and rolled oats, they provide a nutritious base that is high in fiber and healthy fats. Compared to traditional dessert bars, which can be loaded with refined sugars and unhealthy fats, Choco-Banana Dream Bars are a wholesome alternative that doesn’t compromise on taste.
Storage and Shelf Life
To maintain the freshness of your Choco-Banana Dream Bars, consider the following best practices for storage. Once fully set, slice the bars and store them in an airtight container. They can be kept in the refrigerator for up to one week or in the freezer for up to three months.
Freezing is particularly ideal for this recipe, as it allows you to enjoy the bars over an extended period without losing flavor or texture. If you find yourself with leftover bars, get creative by repurposing them. Crumble the bars into smoothies for added nutrition or use them as a topping for yogurt or oatmeal, creating a deliciously convenient breakfast option.
Conclusion
In summary, Choco-Banana Dream Bars are a delightful blend of health and indulgence, offering a nutritious treat that satisfies your sweet tooth without sacrificing flavor. This recipe not only allows you to enjoy a homemade dessert but also empowers you to customize it according to your tastes and dietary needs.
We encourage you to try this recipe and experience the joy of creating a wholesome dessert that fits seamlessly into a balanced diet. Homemade treats bring a special satisfaction, reminding us of the joy of cooking and the love that goes into every bite. Enjoy your Choco-Banana Dream Bars as a delicious snack or dessert that you can feel good about sharing with friends and family.

