Introduction
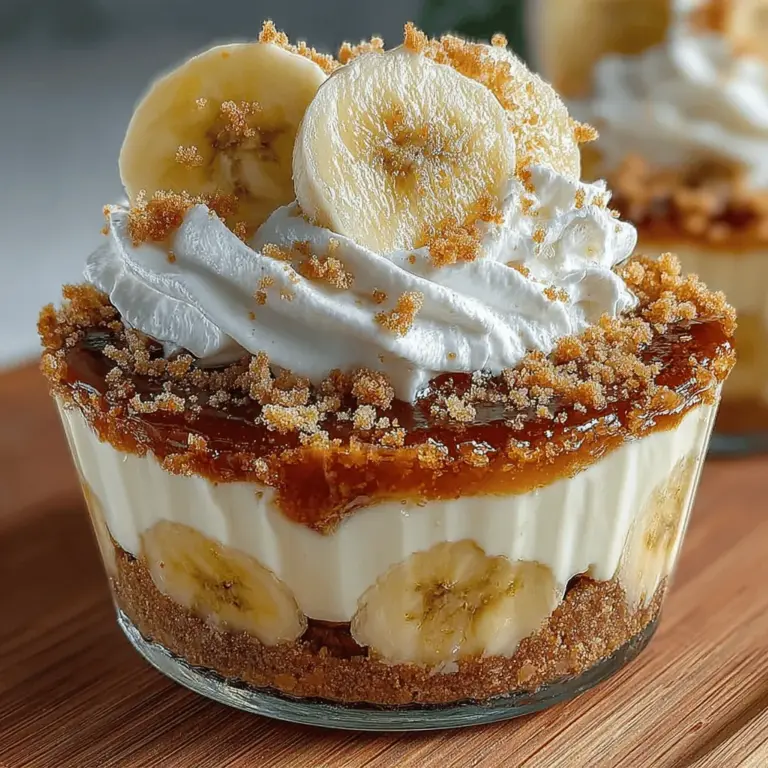
Welcome to the delightful world of desserts, where flavors and creativity come together to create unforgettable treats. Today, we’re excited to introduce you to a scrumptious recipe that promises to elevate your dessert game — Banana Bliss No-Bake Cream Pie Cups. This dessert is not only a feast for the eyes but also a delightful blend of creamy, fruity, and crunchy textures that will leave your taste buds dancing. Whether you’re an experienced baker or a novice in the kitchen, this easy-to-follow recipe will help you impress family and friends alike.
The Banana Bliss No-Bake Cream Pie Cups are a modern twist on the classic banana cream pie. Traditionally, banana cream pies are baked and often take a bit more time and effort to prepare. However, this no-bake version simplifies the process while maintaining all the comforting flavors you love. With layers of velvety vanilla pudding, fresh banana slices, and a crunchy graham cracker crust, these pie cups are a perfect dessert for any occasion, be it a summer picnic, a birthday celebration, or a cozy family dinner.
As we dive into this recipe, we will not only outline the ingredients and preparation steps but also provide you with tips and techniques to ensure your Banana Bliss No-Bake Cream Pie Cups turn out perfect every time.
Ingredients Overview
Before you start whipping up this delightful dessert, it’s essential to understand the key ingredients that make the Banana Bliss No-Bake Cream Pie Cups so irresistible. Each component plays a significant role in creating the rich flavors and textures that define this dessert.
– Fresh Bananas: The star ingredient of this recipe, fresh bananas provide a natural sweetness and creamy texture that perfectly complements the other flavors. Choose ripe but firm bananas for the best results, as they will slice beautifully and hold their shape in the pie cups.
– Heavy Whipping Cream: This ingredient is crucial for creating a light and airy whipped topping. Whipping cream adds richness and a luscious texture to the dessert. Make sure to use heavy whipping cream for the best volume and stability.
– Powdered Sugar: Powdered sugar not only sweetens the whipped cream but also helps stabilize it, ensuring that your topping holds its shape. Using powdered sugar instead of granulated sugar prevents a gritty texture in the whipped cream.
– Vanilla Extract: A splash of vanilla extract enhances the overall flavor profile of the dessert, adding warmth and depth. Opt for pure vanilla extract for the best taste.
– Graham Cracker Crumbs: The base crust of this pie cup is made from graham cracker crumbs, which provide a delightful crunch and a hint of sweetness. You can make your own crumbs by crushing whole graham crackers or purchase pre-made crumbs for convenience.
– Melted Butter: Melted butter binds the graham cracker crumbs together, creating a cohesive and sturdy crust. It also adds richness to the flavor.
– Vanilla Pudding: This ingredient serves as the creamy filling of the pie cups. The vanilla pudding adds richness and depth, making each bite a luxurious experience.
– Ground Cinnamon (Optional): A dash of ground cinnamon introduces a warm spice note that beautifully complements the sweetness of the bananas. This ingredient is optional, but it can elevate the flavor profile of the dessert.
– Whipped Cream and Garnishes: For the finishing touches, a dollop of whipped cream on top of each cup adds a beautiful presentation and extra creaminess. You can also use additional banana slices, chocolate shavings, or a sprinkle of cinnamon as garnishes.
Preparation Steps
To ensure a seamless preparation process, we will provide a detailed breakdown of each step involved in creating the Banana Bliss No-Bake Cream Pie Cups. This will help you navigate the recipe with ease and confidence.
Creating the Crust
The first step in crafting your Banana Bliss No-Bake Cream Pie Cups is to create the graham cracker crust. This crust serves as the foundation for your dessert, providing both flavor and texture.
1. Combine Ingredients: In a medium mixing bowl, combine the graham cracker crumbs and melted butter. The ratio is typically about 1 ½ cups of graham cracker crumbs to ½ cup of melted butter, but you can adjust based on your preference for crust thickness.
2. Mix Well: Use a fork or your fingers to mix the crumbs and melted butter together until the mixture resembles wet sand. You want to ensure that all the crumbs are evenly coated with butter for a cohesive crust.
3. Achieve the Right Texture: A well-prepared crust should hold together when pressed. To test this, take a small handful of the mixture and squeeze it in your hand. If it holds together without crumbling, you’re good to go. If it falls apart, you may need to add a bit more melted butter.
4. Press into Cups: Once the crust mixture is ready, distribute it evenly among your serving cups or ramekins. Use the back of a spoon or your fingers to press the mixture down gently. It’s important not to compact the crust too tightly, as this can make it difficult to scoop out later. Aim for an even layer that will hold its shape without being overly dense.
Assembling the Cups
Now that your crust is set, it’s time to assemble the layers of your Banana Bliss No-Bake Cream Pie Cups. This step is crucial for optimal flavor distribution and visual appeal.
1. Layering Technique: Start by adding a layer of sliced fresh bananas on top of the graham cracker crust. Arrange the banana slices evenly, ensuring that they cover the entire surface. This not only adds flavor but also creates a beautiful presentation.
2. Add Vanilla Pudding: Following the banana layer, spoon a generous amount of vanilla pudding over the bananas, filling the cups until they are about three-quarters full. The pudding should be smooth and creamy, providing a rich contrast to the crunchy crust and soft bananas.
3. Repeat Layers: For added flavor and texture, you can repeat the layering process. Add another layer of banana slices followed by more vanilla pudding. This creates a delightful interplay of flavors and textures in each bite.
4. Final Toppings: If desired, finish each cup with a dollop of whipped cream on top. This not only enhances the presentation but also adds an extra layer of creaminess. You can also sprinkle a dash of ground cinnamon or add a few chocolate shavings for a decorative touch.
Whipping the Cream
The final step in the preparation process involves whipping the cream to create the fluffy topping for your Banana Bliss No-Bake Cream Pie Cups.
1. Chill Your Equipment: For best results, chill your mixing bowl and beaters in the freezer for about 10-15 minutes before whipping the cream. Cold equipment helps the cream whip up faster and achieve a better volume.
2. Combine Ingredients: In the chilled bowl, add the heavy whipping cream and powdered sugar. Start with about 1 cup of heavy cream and 2 tablespoons of powdered sugar, adjusting to your desired sweetness.
3. Whip the Cream: Using an electric mixer, beat the cream on medium-high speed until soft peaks form. This means the cream should hold its shape but still have a slight wave when you lift the beaters. Be careful not to overwhip, as this can lead to a grainy texture.
4. Incorporate Vanilla: Once soft peaks are achieved, gently fold in the vanilla extract. This adds flavor without deflating the whipped cream.
Now that you have your whipped cream ready, you can proceed to top each Banana Bliss No-Bake Cream Pie Cup with a generous dollop, creating a truly decadent dessert experience.
This introduction and initial preparation phase sets the stage for creating delicious Banana Bliss No-Bake Cream Pie Cups that are sure to impress. In the following sections, we will delve deeper into additional tips, variations, and serving suggestions to enhance your dessert experience.
Technique for Achieving Soft Peaks
To create the perfect fluffy whipped cream for your Banana Bliss No-Bake Cream Pie Cups, mastering the technique for achieving soft peaks is essential. Using either a stand mixer or a hand whisk, you can effectively whip the cream until it reaches the desired consistency.
Using a Stand Mixer
1. Select the Right Bowl: Use a large mixing bowl, preferably chilled, as this helps to keep the cream cold during whipping.
2. Add Ingredients: Pour in the heavy cream and add sugar or vanilla extract, if desired, to enhance the flavor.
3. Mixing Speed: Start at a low speed to prevent splattering, then gradually increase to medium-high speed.
4. Watch for Soft Peaks: Keep an eye on the cream as it whips. You’ll know it’s ready when you lift the whisk or beaters, and soft peaks form that gently flop over.
Using a Hand Whisk
1. Choose a Good Whisk: Opt for a sturdy whisk with a wide head to incorporate air effectively.
2. Whip in a Chilled Bowl: As with the mixer, ensure your bowl is cold to facilitate whipping.
3. Vigorous Motion: Whisk vigorously in a circular motion, constantly moving the whisk around the bowl to incorporate air.
4. Check Consistency: This method takes more effort, but you’ll achieve soft peaks when the cream holds its shape but still has a slight droop.
Importance of Timing
Timing is crucial when whipping cream. Over-whipping can lead to a grainy texture or even turning the cream into butter. Aim to stop whipping as soon as you see soft peaks to maintain the light and airy texture essential for your pie cups.
Combining the Pudding and Cream
Once your whipped cream is ready, the next step is to combine it with the vanilla pudding. This is where gentle folding comes into play.
Step-by-Step Instructions
1. Prepare the Pudding: Ensure your vanilla pudding is fully set and chilled before combining.
2. Add Cream to Pudding: Take about one-third of the whipped cream and add it to the pudding mixture. This helps lighten the pudding.
3. Gentle Folding Technique: Using a spatula, carefully fold the whipped cream into the pudding by sliding the spatula down the side of the bowl, across the bottom, and back up over the top. Repeat this motion. Do not stir vigorously, as this will deflate the whipped cream.
4. Incorporate All Cream: Continue folding until no streaks of pudding remain. The mixture should be light and fluffy.
Why This Technique Matters
Folding is crucial because it helps retain the airiness of the whipped cream, ensuring your dessert remains light and creamy rather than dense. This technique also blends the flavors beautifully, creating a harmonious filling for your pie cups.
Filling and Layering
Now that your pudding and whipped cream are combined, it’s time to fill the cups with this delightful mixture.
Best Practices for Spoon Filling
1. Choose the Right Utensil: Use a small spoon or a piping bag with a large round tip for neat filling.
2. Spoon Slowly: Carefully spoon the mixture into each cup, filling them about three-quarters full to allow for layering.
3. Avoid Spills: To avoid mess, tilt the cup slightly while filling or use a piping bag for greater control.
Layering Suggestions
– Banana Slices: After adding the first layer of cream mixture, place a few banana slices on top. This not only enhances the flavor but also adds texture.
– Optional Cinnamon: A light sprinkle of cinnamon over the bananas or next layer can elevate the overall flavor profile, adding warmth and depth to your dessert.
Final Touches
The finishing touches on your Banana Bliss No-Bake Cream Pie Cups are what will truly make them shine.
Topping with Whipped Cream
1. Perfect Dollop Technique: Use a clean spoon to scoop a generous dollop of whipped cream on top of each filled cup. You can also use a piping bag for a more decorative finish.
2. Create Swirls: If using a piping bag, practice creating swirls or rosettes for an elegant presentation.
Garnishing Tips
– Crushed Graham Crackers: Lightly sprinkle crushed graham crackers on top for added crunch and visual appeal. This mimics the crust of a traditional pie and adds texture.
– Banana Slices: Add a few fresh banana slices on top of the whipped cream for a fresh look and a hint of what’s inside.
Chilling for Best Results
Refrigeration is a vital step in preparing your Banana Bliss No-Bake Cream Pie Cups.
Importance of Refrigeration
– Flavor Melting: Allow the cups to chill in the refrigerator for at least one hour. This time lets the flavors meld beautifully, enhancing the overall taste.
– Texture Setting: Chilling also ensures the mixture firms up, making it easier to serve and eat.
Impact on Enjoyment
The chilling process not only improves the flavor but also provides a refreshing taste that complements the creaminess of the pudding and whipped cream. When served cold, the dessert feels more indulgent and satisfying.
Serving Suggestions
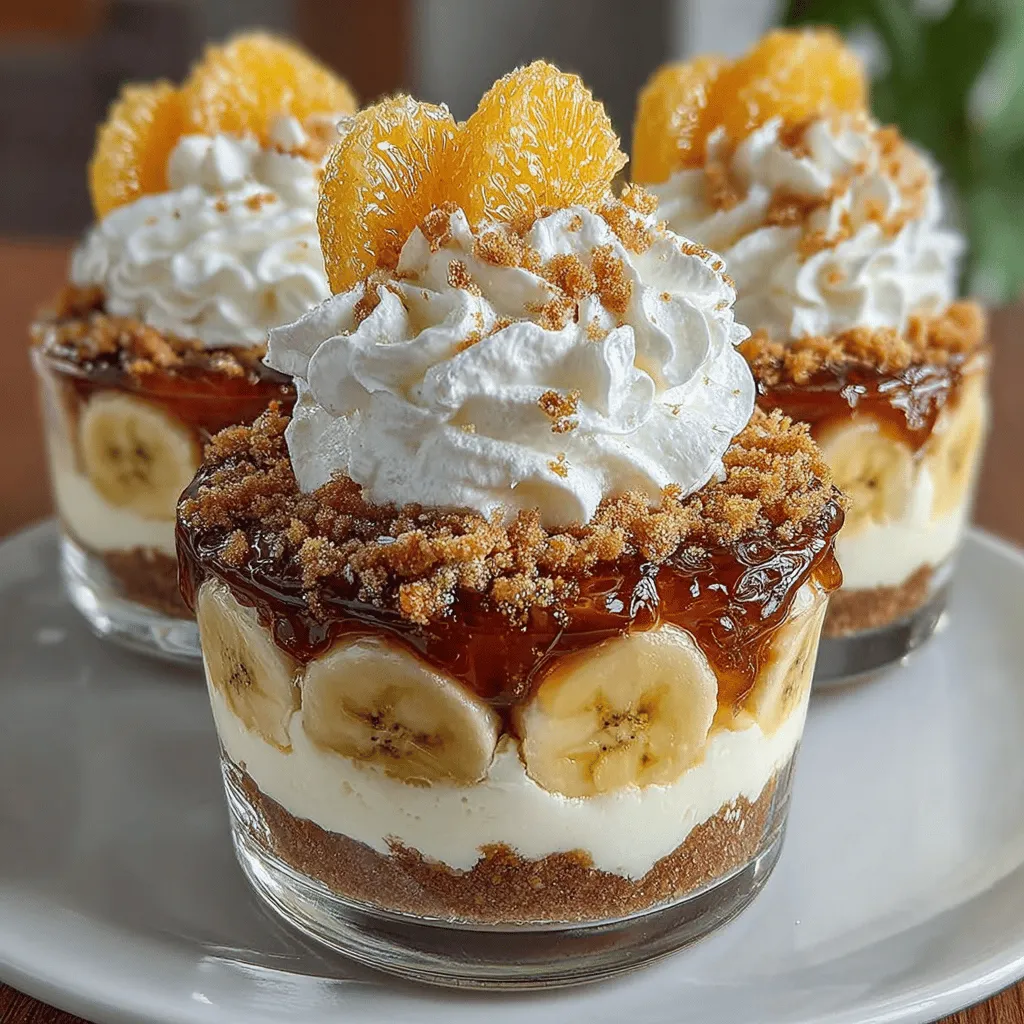
Presenting your Banana Bliss No-Bake Cream Pie Cups in an appealing manner can enhance the overall dining experience.
Presentation Ideas
– Elegant Glassware: Serve in clear glass cups or small mason jars to showcase the beautiful layers and colors of the dessert.
– Themed Decor: If serving at a gathering, consider a banana or tropical theme with decorative napkins or tableware to enhance the experience.
Beverage Pairings
– Refreshing Beverages: Pair these cups with a light iced tea or a sparkling lemonade. The acidity of these drinks complements the sweetness of the pie cups.
– Coffee or Tea: For a more comforting option, serve with a cup of coffee or herbal tea, perfect for an afternoon treat.
Ideal for Gatherings
These cups are perfect for parties, potlucks, or family gatherings. Their individual servings make them easy to distribute and enjoy without the need for slicing.
Nutritional Information
Here’s a brief overview of the nutritional content of the Banana Bliss No-Bake Cream Pie Cups:
– Serving Size: 1 cup
– Calories: Approximately 250 calories per serving
– Key Nutrients:
– Total fat: 13g
– Saturated fat: 8g
– Carbohydrates: 30g
– Sugars: 15g
– Protein: 3g
This dessert provides a delightful treat with a balance of sweetness and creaminess while still being mindful of nutritional intake.
Conclusion
The Banana Bliss No-Bake Cream Pie Cups are an ideal dessert choice for any occasion, combining simplicity, flavor, and elegance. With this comprehensive guide, you can confidently create a delicious treat that will be loved by all. Whether you are celebrating a special event or simply indulging in a sweet craving, these delightful cups deliver satisfaction with every spoonful. Enjoy the process of making this dessert as much as you will enjoy savoring it with family and friends. By following the steps and tips outlined, you’ll be able to impress your guests and create a memorable dessert experience that leaves everyone wanting more.

