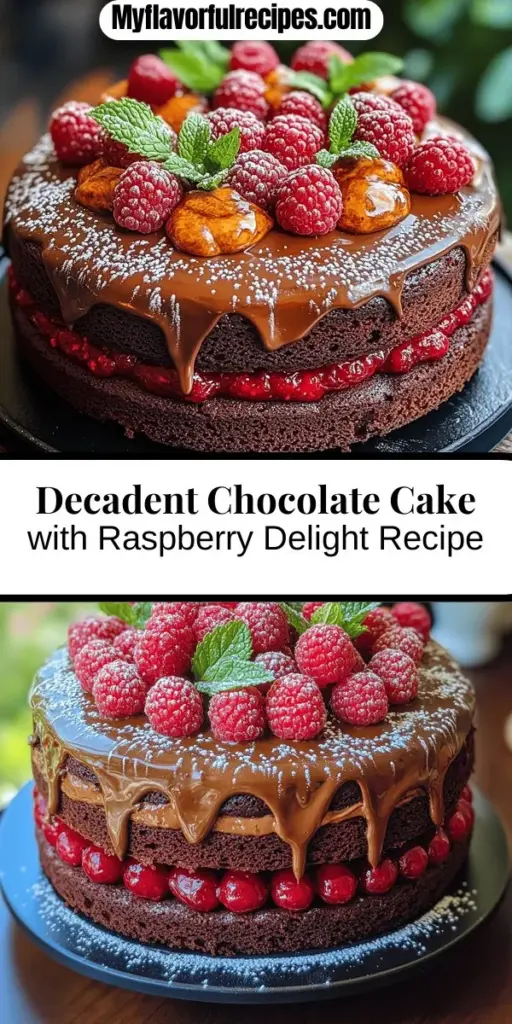
Indulging in a slice of rich chocolate cake is an experience that many of us cherish. The aroma of freshly baked chocolate wafting through the kitchen, the excitement of cutting into a perfectly layered cake, and the delightful combination of flavors that dance on your palate are all part of what makes a chocolate cake a timeless dessert. In this blog post, we will guide you through the creation of a Decadent Chocolate Cake with Fresh Raspberry Bliss—a delightful treat that perfectly balances the intense flavor of chocolate with the tartness of fresh raspberries.
This cake is not just a feast for the taste buds; it’s a visual masterpiece that can elevate any gathering or celebration. Whether you’re hosting a birthday party, a holiday dinner, or simply craving something sweet, this cake is sure to impress. Not only will you learn how to bake this scrumptious cake, but you’ll also discover the science behind each ingredient, tips for perfecting your technique, and ways to present this dessert beautifully for any occasion.
Understanding the Ingredients
To craft a truly decadent chocolate cake, understanding the role of each ingredient is crucial. This cake is composed of three main components: the chocolate cake layers, the raspberry filling, and the chocolate ganache. Let’s delve into each ingredient to see how they contribute to the overall flavor and texture of the cake.
Exploring the Cake Ingredients
All-Purpose Flour
All-purpose flour serves as the foundation of our cake, providing structure and stability. It contains a moderate amount of protein, which helps in developing gluten—an essential component for the cake’s texture. When flour is combined with liquid and stirred, the gluten strands form, which supports the cake’s rise and gives it a tender crumb. For the best results, be sure to measure your flour correctly, as too much can lead to a dense cake.
Granulated Sugar
Granulated sugar is another essential ingredient that not only sweetens the cake but also affects its texture. When sugar is creamed with butter, it creates air pockets that help the cake rise during baking. This process contributes to a light and fluffy texture. Additionally, sugar enhances the overall flavor profile and helps retain moisture in the cake, making it more enjoyable to eat.
Unsweetened Cocoa Powder
To achieve the rich chocolate flavor that defines this cake, unsweetened cocoa powder is a must. It provides the deep, intense chocolate taste we crave without adding additional sugar. When choosing cocoa powder, consider using high-quality Dutch-processed cocoa for a smoother flavor and darker color. The cocoa powder also interacts with the baking soda and baking powder, contributing to the cake’s leavening.
Baking Powder and Baking Soda
Understanding leavening agents is key to baking success. Baking powder and baking soda act as the raising agents in our cake. Baking soda requires an acid to activate, while baking powder contains both an acid and a base. In this recipe, the cocoa powder and buttermilk (or milk) provide the necessary acidity for the baking soda to work. Together, these leavening agents create lift, resulting in a light and airy cake.
Salt
While salt might seem like a minor ingredient, it plays a significant role in enhancing flavor. Salt balances the sweetness of the cake and amplifies the chocolate notes. It also strengthens the gluten structure, contributing to a better texture.
Eggs, Milk, Vegetable Oil, and Vanilla Extract
These ingredients work together to build a moist and flavorful batter. Eggs provide structure, richness, and moisture, while milk adds creaminess and flavor. Vegetable oil contributes to the cake’s moistness, giving it a tender crumb that stays fresh longer. Finally, a splash of vanilla extract rounds out the flavor profile, adding warmth and depth to the cake.
Boiling Water
You may be surprised to see boiling water listed among the ingredients, but it is a crucial step in chocolate cake preparation. Adding boiling water to the batter helps to bloom the cocoa powder, intensifying its flavor and ensuring that the cake remains moist. The heat from the water also helps to dissolve the sugar and activate the cocoa, creating a smoother batter.
Examining the Raspberry Filling
Now that we’ve covered the chocolate cake layers, let’s turn our attention to the raspberry filling, which adds a burst of flavor and a beautiful contrast to the rich chocolate.
Choosing the Right Raspberries
When selecting raspberries, freshness is key. Opt for plump, bright red berries that are firm to the touch. Avoid any that are mushy or have mold, as they can affect the flavor and texture of the filling. If fresh raspberries are out of season, frozen raspberries can be used as a substitute; just be sure to thaw and drain them to remove excess moisture.
Granulated Sugar in Raspberry Filling
Granulated sugar plays a vital role in balancing the natural tartness of the raspberries. By adding sugar, we enhance the sweetness and create a luscious filling that complements the chocolate cake beautifully. The amount of sugar can be adjusted based on your personal preference and the tartness of the berries.
The Role of Lemon Juice
A splash of lemon juice in the raspberry filling not only brightens the flavor but also adds a hint of acidity that enhances the overall taste profile. The citrus notes work harmoniously with the raspberries, making them taste even more vibrant.
Thickening with Cornstarch
To achieve the right consistency for the raspberry filling, cornstarch is used as a thickening agent. When mixed with water and heated, cornstarch activates and thickens the filling, preventing it from being too runny. This ensures that the filling holds its shape when layered between the cake, creating a visually appealing presentation.
Analyzing the Chocolate Ganache
The final touch to our Decadent Chocolate Cake is the luscious chocolate ganache, which adds a rich and glossy finish.
Balance Between Heavy Cream and Chocolate
The ganache is made from a simple combination of heavy cream and chocolate. The ratio of these two ingredients is crucial; typically, a 1:1 ratio results in a pourable ganache, perfect for glazing. For a thicker ganache suitable for frosting, a 2:1 ratio of chocolate to cream is often used.
Significance of Vanilla Extract
Just like in the cake batter, vanilla extract enhances the flavor of the ganache, adding a layer of complexity that elevates the chocolate taste. It’s a small addition that has a big impact on the overall flavor profile of the dessert.
Step-by-Step Baking Process
Now that we’ve covered the essential ingredients, it’s time to prepare for baking. Here’s how to get started on your Decadent Chocolate Cake with Fresh Raspberry Bliss.
Preparing Your Oven and Pans
Before you start mixing ingredients, it’s important to prepare your oven and baking pans.
Essential Baking Equipment and Tools
Make sure you have the following tools on hand:
– Two 9-inch round cake pans
– Parchment paper
– Mixing bowls (one large and one medium)
– Electric mixer or whisk
– Rubber spatula
– Measuring cups and spoons
– Cooling rack
Tips for Greasing and Flourishing Cake Pans
Properly greasing and flouring your cake pans is essential to ensure that the cakes release easily once baked. Start by greasing the pans with butter or cooking spray, then add a dusting of flour, tapping out the excess. For added security, you can line the bottom of each pan with a round of parchment paper, which will further prevent sticking.
Crafting the Perfect Chocolate Cake
With your pans prepared, it’s time to create the batter for your chocolate cake.
Detailed Mixing Techniques
1. Cream the Butter and Sugar: In a large mixing bowl, combine softened butter and granulated sugar. Using an electric mixer, beat the mixture on medium speed until it becomes light and fluffy—about 3-5 minutes. This step is crucial for incorporating air into the batter, which contributes to the cake’s rise.
2. Add the Eggs: Add the eggs one at a time, mixing well after each addition. This ensures that the eggs are fully incorporated, which aids in the emulsification process, resulting in a smooth batter.
3. Incorporate the Dry Ingredients: In a separate bowl, sift together the all-purpose flour, cocoa powder, baking powder, baking soda, and salt. Gradually add this dry mixture to the wet ingredients, alternating with the milk and vegetable oil. Mix until just combined, being careful not to overmix, as this can lead to a dense cake.
4. Add Boiling Water: Finally, stir in the boiling water until the batter is smooth. The batter will be thin, but this is normal and will result in a moist cake.
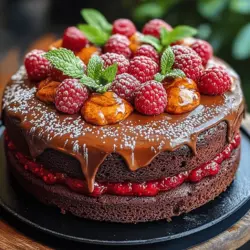
With these steps, you are well on your way to creating a Decadent Chocolate Cake with Fresh Raspberry Bliss that is sure to impress. As we continue through this recipe, we’ll explore the process of making the raspberry filling and chocolate ganache, ensuring that every layer of this cake is as delicious as it is beautiful.
{{image_1}}
Tips for Ensuring Even Baking and Preventing Dome-Shaped Cakes
To achieve a perfectly flat chocolate cake, there are a few essential tips to keep in mind. First, ensure that your oven is properly preheated before placing the cake inside. An oven thermometer can help confirm your oven’s actual temperature, as many home ovens can be off by several degrees.
Another key factor is your baking pans. Make sure you are using the right size pans as specified in the recipe. If you use a pan that is too small, your batter may overflow or bake unevenly. If you notice that your cakes tend to rise in the middle, consider using a baking strip, which is a damp cloth wrapped around the outside of your pan. This helps regulate the temperature of the pan, leading to even baking.
Additionally, avoid overmixing your batter. Once the dry ingredients are combined with the wet ingredients, mix just until incorporated. Overmixing can lead to excess air being trapped in the batter, resulting in a dome shape as it bakes.
Finally, bake your cakes one at a time if possible, as placing multiple pans in the oven can disrupt heat circulation, leading to uneven baking.
Cooling Techniques: Why It’s Important to Cool Cakes Properly
Cooling cakes properly is crucial for maintaining their structure and texture. After removing the cakes from the oven, allow them to sit in the pans for about 10-15 minutes. This resting period allows the cakes to firm up slightly, making them easier to remove without breaking.
Once they have cooled in the pans, gently run a knife around the edges to loosen the cakes, then invert them onto a wire rack. Cooling on a wire rack allows air to circulate around the cake, preventing condensation, which can lead to sogginess. It’s essential to let the cakes cool completely before assembling, ideally for at least an hour. If you’re short on time, you can place the cakes in the refrigerator for a quicker chill, but ensure they are wrapped in plastic wrap to prevent drying out.
Making the Raspberry Filling
Cooking Tips for Avoiding a Runny Filling
Creating the perfect raspberry filling requires a careful balance of technique and patience. Start by using fresh or frozen raspberries; both yield excellent results. If using frozen raspberries, thaw them completely and drain any excess liquid before cooking. This step is vital to avoid a runny filling.
In a saucepan, combine the raspberries with sugar and a bit of cornstarch. The cornstarch acts as a thickening agent, ensuring your filling has the right consistency. Cook the mixture over medium heat, allowing it to simmer gently. Stir frequently to prevent sticking and burning.
How to Know When the Filling is Ready
You’ll know the raspberry filling is ready when it has thickened to a syrupy consistency and the raspberries have broken down. This process usually takes about 5-10 minutes. Once done, remove it from the heat and allow it to cool completely before using it in your cake assembly. If you want a smoother filling, you can blend it briefly with an immersion blender for a more refined texture.
Creating Smooth Chocolate Ganache
Techniques for Achieving a Glossy Finish
A glossy chocolate ganache is the crowning glory of your decadent cake. To make ganache, start with high-quality chocolate—dark chocolate is recommended for a rich flavor. Chop the chocolate into small pieces for even melting.
In a separate saucepan, heat heavy cream until it’s just about to boil. Pour the hot cream over the chopped chocolate and let it sit for a few minutes. This resting period allows the chocolate to soften adequately. Then, gently stir the mixture until smooth and glossy. If you’re aiming for a thicker ganache, use less cream; for a pourable consistency, increase the cream slightly.
Cooling Tips for the Right Ganache Consistency
Once your ganache is smooth, let it cool at room temperature until it thickens slightly. This process usually takes about 30-60 minutes, depending on your room temperature. For a thicker ganache suitable for spreading, refrigerate it for a short time, checking frequently to ensure it doesn’t become too firm.
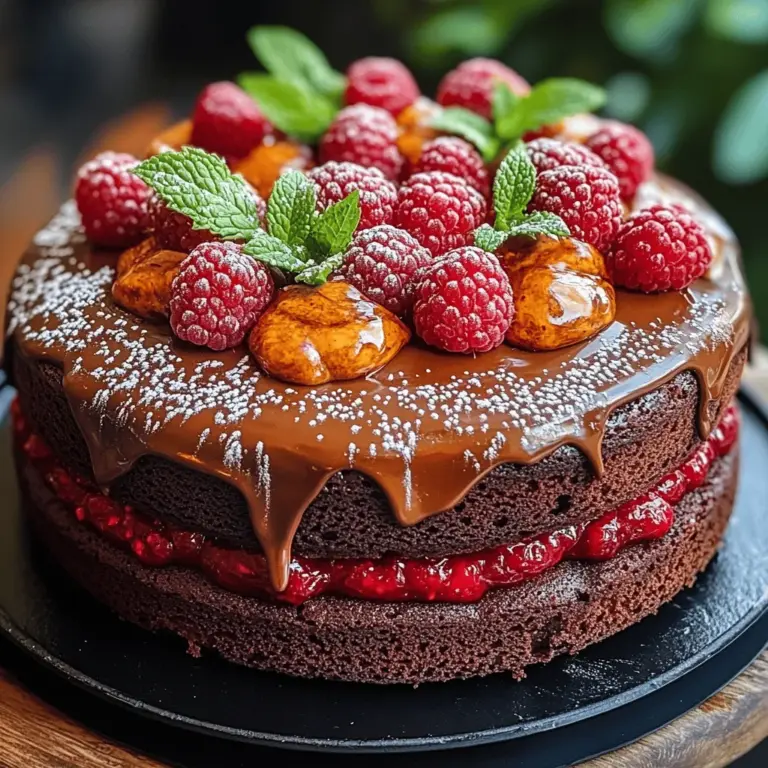
Assembling Your Decadent Cake
Layering the Cake
When it comes to layering your cake, precision is key. Start with the first layer of chocolate cake on your serving plate or cake stand. If your cake layers have domed slightly, you can level them off using a serrated knife or cake leveler to create a flat surface.
Spread a generous layer of raspberry filling on top of the first cake layer, ensuring you leave a small border around the edges to prevent the filling from oozing out when you add the next layer. Place the second layer on top, gently pressing down to secure it in place.
Best Practices for Stacking Layers Without Slipping
To prevent the layers from slipping, consider using small wooden dowels or straws inserted vertically into the cake for added support. This technique is especially helpful for multi-layer cakes. Always ensure that each layer is positioned directly on top of the previous layer before adding the next.
Techniques for Spreading Filling and Ganache Evenly
For an even spread of ganache, use an offset spatula. Start by placing a dollop of ganache on the top of the cake and gently spread it outward. Allow some ganache to drip down the sides for a rustic look, or you can smooth it out for a cleaner finish.
Garnishing Techniques
Creative Ways to Decorate with Fresh Raspberries and Mint Leaves
To give your cake a beautiful finish, garnish it with fresh raspberries and mint leaves. Scatter raspberries on top of the cake and between the layers for a pop of color. You can also add sprigs of mint to enhance the overall presentation.
Options for Dusting with Powdered Sugar for an Elegant Finish
For an elegant touch, consider dusting the top of your cake with powdered sugar. Use a fine-mesh sieve to sprinkle the sugar evenly, creating a beautiful contrast against the dark chocolate. This simple technique adds sophistication without overpowering the other flavors.
Serving Suggestions
Best Beverages to Complement Chocolate Cake
When serving your decadent chocolate cake with raspberry filling, pair it with beverages that enhance the flavors. A rich red wine, such as a Cabernet Sauvignon, complements the chocolate beautifully. For a non-alcoholic option, consider serving a raspberry-flavored sparkling water or a bold coffee to balance the sweetness.
Serving Temperature and Presentation Tips
Serve your cake at room temperature for the best flavor and texture. Before presenting, make sure to slice the cake using a warm knife; simply dip it in hot water and wipe it dry. This technique ensures clean cuts, allowing your guests to appreciate the beautiful layers.
Nutritional Information and Serving Size
Understanding Caloric Content
While indulging in a slice of decadent chocolate cake is a delightful experience, it’s beneficial to be aware of the nutritional content. A standard slice of this cake can have approximately 400-500 calories, depending on the size and specific ingredients used.
Nutritional Breakdown Per Serving
A rough estimate of the nutritional breakdown per slice includes around 25 grams of fat, 50 grams of carbohydrates, and 5 grams of protein. This rich dessert provides a significant indulgence, so consider portion control when serving.
Healthier Alternatives for Ingredients
If you’re looking to make a lighter version of this cake, consider substituting some ingredients. For example, you can use applesauce in place of some of the butter, or swap out all-purpose flour for almond flour for added nutrition. Additionally, using a sugar substitute can help reduce the overall caloric content while still delivering on sweetness.
Conclusion: The Joy of Baking and Sharing Decadent Chocolate Cake
Creating a decadent chocolate cake with fresh raspberry bliss is not just about the final product; it’s about the joy of baking and sharing delicious moments with friends and family. This cake offers a perfect blend of flavors and textures, making it an ideal centerpiece for any celebration. By mastering the steps outlined, you can bring a piece of indulgence to your table and create lasting memories with each slice.
Whether it’s a special occasion or a simple gathering, this cake is sure to impress and satisfy. So roll up your sleeves, gather your ingredients, and embark on this delightful baking adventure—your taste buds will thank you!