Introduction
If you’re searching for a quick, nutritious snack that satisfies your sweet tooth, look no further than Crunchy Peanut Butter Bliss Balls. These delightful treats are not only easy to whip up but also pack a powerful punch when it comes to flavor and nutrition. Made with simple, wholesome ingredients, they cater to a variety of dietary preferences, from vegan to gluten-free. Whether you need a post-workout snack, a midday energy boost, or a delicious dessert, these bliss balls are versatile enough to fit into any occasion.
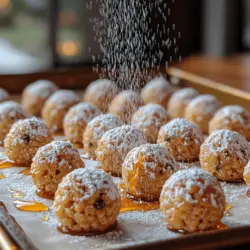
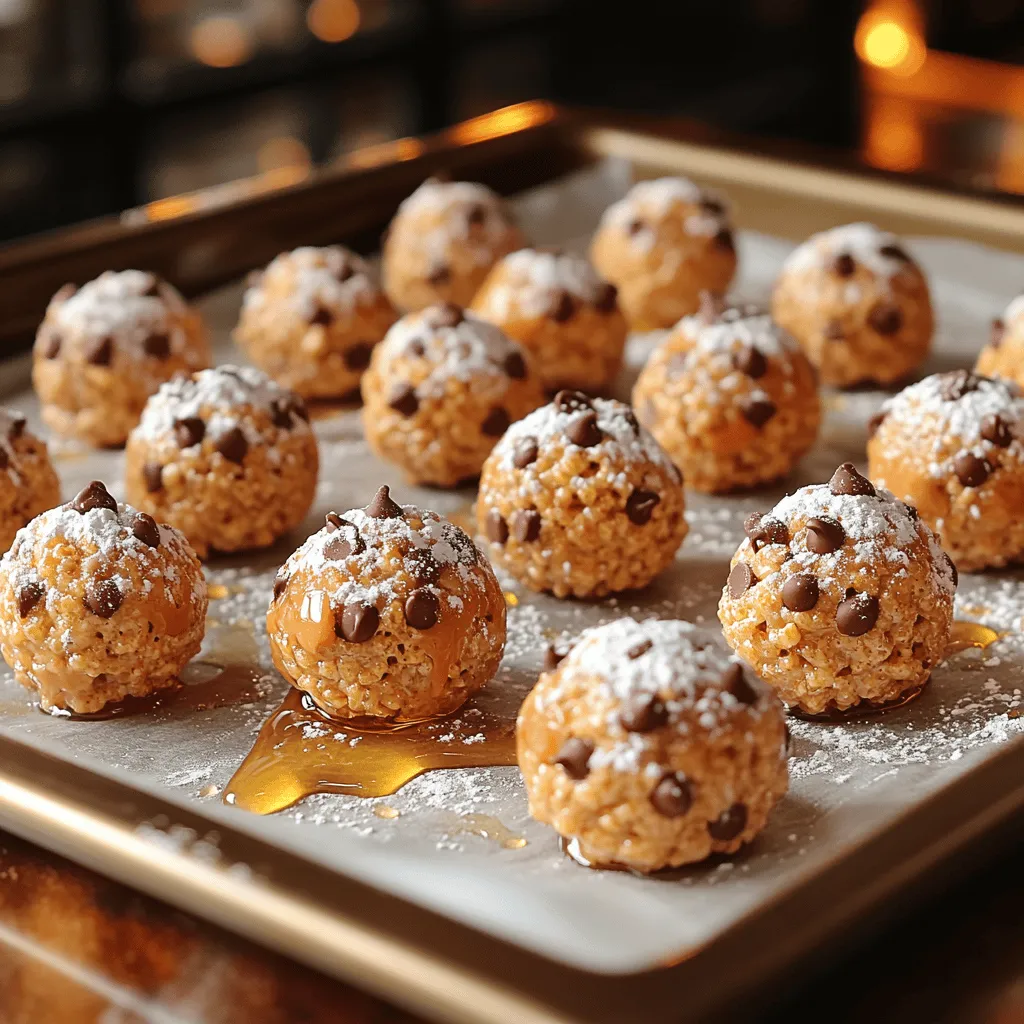
The appeal of Crunchy Peanut Butter Bliss Balls lies in their combination of flavors and textures. The creamy richness of peanut butter meets the delightful crunch of Rice Krispies, creating a satisfying mouthfeel that keeps you coming back for more. Plus, with their no-bake preparation, you can have a batch ready in no time, making them a perfect choice for busy individuals or families.
Understanding the Ingredients
To truly appreciate the magic behind Crunchy Peanut Butter Bliss Balls, it’s essential to understand the role each ingredient plays in this recipe. Let’s break down the components that contribute to the deliciousness and health benefits of these energy bites.
Rice Krispies Cereal
One of the key ingredients in these bliss balls is Rice Krispies cereal. Known for their iconic snap, crackle, and pop, these tiny rice puffs add a delightful crunch and texture that elevates the entire treat. Beyond enhancing the mouthfeel, Rice Krispies provide a lightness that balances the creaminess of the peanut butter. They are also a source of carbohydrates, making them a quick source of energy. Opting for brown rice cereal can offer additional fiber and nutrients, catering to health-conscious eaters.
Creamy Peanut Butter
Next up is creamy peanut butter, which serves as the base for these bliss balls. Packed with protein and healthy fats, peanut butter not only contributes to the flavor but also provides sustained energy. It’s a great source of vitamins and minerals, including vitamin E, magnesium, and potassium. The rich, nutty flavor of peanut butter complements the sweetness of the other ingredients, making each bite indulgently satisfying. For those with dietary restrictions, there are plenty of alternatives available, such as almond butter or sunflower seed butter, which can be used without sacrificing taste.
Honey or Maple Syrup
To sweeten our bliss balls naturally, we turn to honey or maple syrup. Both options are excellent alternatives to refined sugars, providing a touch of sweetness without the sugar crash that often follows. Honey offers antimicrobial properties and antioxidants, while maple syrup is rich in minerals like manganese and zinc. Both add moisture and enhance the overall flavor profile of the bliss balls. When selecting your sweetener, consider using raw honey for added health benefits, or choose organic maple syrup for a rich, earthy sweetness.
Vanilla Extract
Vanilla extract is a staple in many dessert recipes, and for good reason. It enhances the overall flavor, adding depth and aroma to the bliss balls. The warm, sweet notes of vanilla pair beautifully with the nutty peanut butter and the sweetness from honey or maple syrup. Using pure vanilla extract will provide the best flavor, as artificial varieties often lack the complexity found in the natural version.
Powdered Sugar
While optional, powdered sugar can be used to adjust the sweetness and texture of the bliss balls. It dissolves easily into the mixture, providing a smooth consistency without the grit of granulated sugar. For those looking to keep their snacks as natural as possible, consider omitting this ingredient or substituting it with a natural sweetener like coconut sugar.
Mini Chocolate Chips
Every bliss ball needs a little indulgence, and mini chocolate chips fit the bill perfectly. They bring a rich chocolate flavor that pairs wonderfully with peanut butter, making each bite feel like a treat. Chocolate chips also add a touch of sweetness and texture, creating a delightful contrast to the crunch of Rice Krispies. For a healthier option, look for dark chocolate chips that contain a higher percentage of cocoa, offering antioxidants along with their rich flavor.
Salt
A pinch of salt may seem like a minor ingredient, but it plays a crucial role in balancing sweetness and enhancing flavors. Salt brings out the natural flavors of all the other ingredients, making them pop. When using salt, opt for a high-quality sea salt or Himalayan pink salt for added minerals and a more nuanced flavor.
Importance of Ingredient Quality and Sourcing
When it comes to preparing Crunchy Peanut Butter Bliss Balls, the quality of your ingredients can significantly impact the final product. Choosing organic and non-GMO ingredients whenever possible ensures that you’re not only creating a delicious snack but also supporting sustainable farming practices. Freshness matters too; using freshly opened jars of peanut butter or newly purchased Rice Krispies will contribute to the overall taste and texture.
Step-by-Step Preparation Guide
Now that we’ve explored the ingredients, it’s time to dive into the preparation of Crunchy Peanut Butter Bliss Balls. Having a well-organized workspace can make the cooking process smoother and more enjoyable, so let’s start by preparing your kitchen.
Preparing Your Workspace
A clean and organized kitchen is essential for any recipe. Begin by gathering all your ingredients and tools. You will need:
– A mixing bowl
– A spatula or spoon for mixing
– A measuring cup and spoons
– A baking sheet or plate for chilling the bliss balls
– Parchment paper (optional for easy cleanup)
Make sure your countertop is clear, and wash your hands before starting. This ensures a hygienic cooking environment and allows you to work efficiently.
Mixing Wet Ingredients
The first step in creating your Crunchy Peanut Butter Bliss Balls is to mix the wet ingredients. In a large mixing bowl, combine the creamy peanut butter, honey (or maple syrup), and vanilla extract.
To achieve the perfect consistency, consider these tips:
1. Room Temperature Ingredients: If your peanut butter is cold, it may be too thick to mix easily. Allow it to sit at room temperature for a bit before starting. This will make it easier to blend with the other ingredients.
2. Stirring Technique: Use a spatula or spoon to thoroughly combine the peanut butter, honey, and vanilla. Start by mixing the peanut butter and honey together until they are well incorporated. Then, slowly add in the vanilla extract. Mix until the mixture is smooth and homogenous.
3. Adjusting Consistency: If the mixture seems too thick, you can add a small amount of warm water to help thin it out slightly. Just be careful not to make it too runny; you want it to be thick enough to hold together when you form the balls.
Once your wet ingredients are combined and smooth, you are ready to incorporate the dry ingredients in the next steps. But before we proceed, take a moment to appreciate the rich, nutty aroma of the peanut butter and the sweet scent of vanilla in your mixing bowl. This is just the beginning of creating a delectable snack that you and your loved ones will enjoy!
Stay tuned for the next part of this article, where we will continue the step-by-step guide, detailing how to combine the dry ingredients, form the bliss balls, and chill them to perfection.
Adding Crunch: Tips for Evenly Incorporating Rice Krispies
When it comes to making Crunchy Peanut Butter Bliss Balls, achieving that perfect balance of crunch and texture is essential. Rice Krispies are the secret ingredient that adds that delightful crunch, but they need to be incorporated carefully to maintain their integrity.
To evenly distribute the Rice Krispies throughout the mixture, follow these tips:
1. Mixing Method: After you’ve combined your peanut butter, honey, and other wet ingredients, gently fold in the Rice Krispies using a spatula. Avoid vigorous stirring, as this can crush the cereal and diminish the crunch factor.
2. Portion Control: If you’re making a larger batch, consider adding the Rice Krispies in two or three increments. This method allows for better distribution and ensures that every bliss ball has that signature crunch.
3. Sift and Shake: If you notice clumping, try sifting the Rice Krispies before adding them to the mixture. This can help separate any pieces stuck together and make it easier to fold into the dough.
Sweetening Up: Adjusting Sweetness According to Personal Preference
One of the best things about making your own Crunchy Peanut Butter Bliss Balls is the ability to control the sweetness. Depending on your taste preferences or dietary needs, you can adjust the sweetness level. Here’s how:
1. Starting Point: The base recipe typically calls for a specific amount of honey or maple syrup. Begin with this amount, as it provides a good balance of sweetness without overwhelming the other flavors.
2. Taste Test: As you mix, take a small taste of the mixture. If you prefer a sweeter treat, gradually add a teaspoon more of your chosen sweetener. Remember to mix thoroughly after each addition to ensure an even flavor.
3. Alternative Sweeteners: If you are looking for a lower glycemic index option, consider using agave nectar or coconut sugar. Each sweetener has its unique flavor profile, so experiment to find your ideal match.
Incorporating Chocolate Chips: How to Mix Without Breaking the Krispies
Chocolate chips can elevate your Crunchy Peanut Butter Bliss Balls, adding a touch of indulgence and flavor. However, you’ll want to ensure that the texture remains intact. Here’s how to do it without compromising the Krispies:
1. Use Mini Chips: Opt for mini chocolate chips instead of standard-sized ones. They mix in more easily and distribute evenly throughout the mixture without clumping.
2. Fold Gently: Similar to the incorporation of Rice Krispies, gently fold the chocolate chips into the mixture using a spatula. This technique helps to prevent crushing the Rice Krispies while ensuring that every bliss ball gets its fair share of chocolate.
3. Chill Before Adding: If you find that your mixture is too soft, consider chilling the dough for about 15-20 minutes before adding the chocolate chips. This will firm it up slightly, making it easier to mix without breaking the texture.
Forming Balls: Techniques for Rolling Uniform Sizes
Once your mixture is ready, the next step is to form it into uniform balls. This ensures that each bliss ball bakes evenly and looks appealing. Here are some techniques to help you achieve uniformity:
1. Use a Cookie Scoop: To get precise measurements, consider using a cookie scoop or a tablespoon. This tool allows you to measure out the same amount of mixture each time, resulting in evenly sized balls.
2. Wet Hands: If you find that the mixture sticks to your hands, lightly wetting your hands with water can help. This prevents the sticky mixture from adhering and makes rolling easier.
3. Rolling Technique: Gently roll the mixture between your palms to form smooth balls. This technique helps to compact the ingredients and gives a nice finish to your bliss balls.
Chilling: Why This Step is Crucial for Texture
Chilling the bliss balls is a crucial step that should not be overlooked. Here’s why:
1. Firming Up: Chilling helps the bliss balls firm up, making them easier to handle and reducing the risk of them falling apart when you bite into them. This is especially important if you’ve added chocolate chips or have a softer mixture.
2. Flavor Development: Allowing the bliss balls to chill also enhances the flavors as they meld together. You’ll notice that they taste even better after they’ve had some time to rest in the refrigerator.
3. Storage: Chilling the bliss balls makes them more stable for storage. Once they are set, you can transfer them to an airtight container and store them in the fridge for up to a week.
Serving and Storing: Best Practices for Longevity and Enjoyment
Enjoying your Crunchy Peanut Butter Bliss Balls goes beyond just making them. Here are some best practices for serving and storing them to maximize their freshness:
1. Serving Suggestions: Serve the bliss balls as a snack, dessert, or even a pre-workout energy boost. They pair well with a cup of coffee or tea and make a great addition to lunch boxes for both kids and adults.
2. Storage Tips: Store your bliss balls in an airtight container in the refrigerator. They can last up to a week when stored properly. If you want to keep them for longer, consider freezing them. Place them in a single layer in a freezer-safe bag or container, and they can last for up to three months.
3. Defrosting: When you’re ready to enjoy a frozen bliss ball, simply remove it from the freezer and allow it to thaw at room temperature for about 10-15 minutes before eating.
Nutritional Information
Understanding the nutritional benefits of your Crunchy Peanut Butter Bliss Balls is essential, especially if you’re mindful of your diet. Here’s a breakdown of the calories and nutritional content per serving:
– Calories: Approximately 100 calories per bliss ball (depending on size and specific ingredients used)
– Protein: Each bliss ball contains about 4 grams of protein, thanks to the peanut butter.
– Healthy Fats: The natural fats from the peanut butter provide heart-healthy monounsaturated fats.
– Fiber: You can expect around 1-2 grams of fiber per ball, which aids in digestion and adds to satiety.
Health Benefits of Ingredients:
– Peanut Butter: Rich in protein and healthy fats, peanut butter is known for its satiating properties and energy-boosting potential.
– Oats: If you include oats in your recipe, they add additional fiber and nutrients, promoting heart health.
– Rice Krispies: While they add crunch, they also provide carbohydrates for quick energy.
Considerations for Dietary Restrictions:
– Gluten-Free: Use certified gluten-free oats and Rice Krispies to make this recipe suitable for those with gluten sensitivities.
– Vegan Options: Substitute honey with agave syrup or maple syrup to cater to vegan diets.
Variations and Customization
The versatility of Crunchy Peanut Butter Bliss Balls allows you to customize them based on dietary needs and personal preferences. Here are some creative ideas:
1. Alternative Ingredients:
– Nut-Free: Substitute peanut butter with sunflower seed butter or tahini for those with nut allergies.
– Different Cereals: Experiment with other cereals like cornflakes or puffed rice for a different texture.
2. Flavor Variations:
– Spices: Consider adding cinnamon, nutmeg, or even a pinch of sea salt to enhance the flavor profile.
– Extracts: A splash of vanilla, almond, or coconut extract can add a unique twist to your bliss balls.
3. Creative Ways to Serve:
– Dessert: Drizzle some melted dark chocolate over the bliss balls for a decadent dessert option.
– Snack Packs: Pack them in snack bags for easy grab-and-go options for hiking, road trips, or busy days.
Conclusion
Crunchy Peanut Butter Bliss Balls are not just a delightful treat; they are a testament to the joy of simple, wholesome ingredients coming together in a fun and easy way. Their simplicity in preparation makes them accessible for everyone, from seasoned cooks to kitchen novices. The ability to customize and adjust the flavors ensures that they can suit various occasions, whether you need a quick snack, a post-workout boost, or a sweet dessert for a gathering.
Encourage yourself to try this recipe, enjoying the process of blending flavors and textures. With a few simple steps, you can create a batch of bliss balls that are not only delicious but also nutritious, making them a perfect addition to your culinary repertoire. Whether you’re enjoying them solo or sharing with friends and family, Crunchy Peanut Butter Bliss Balls are sure to please and satisfy.