Introduction
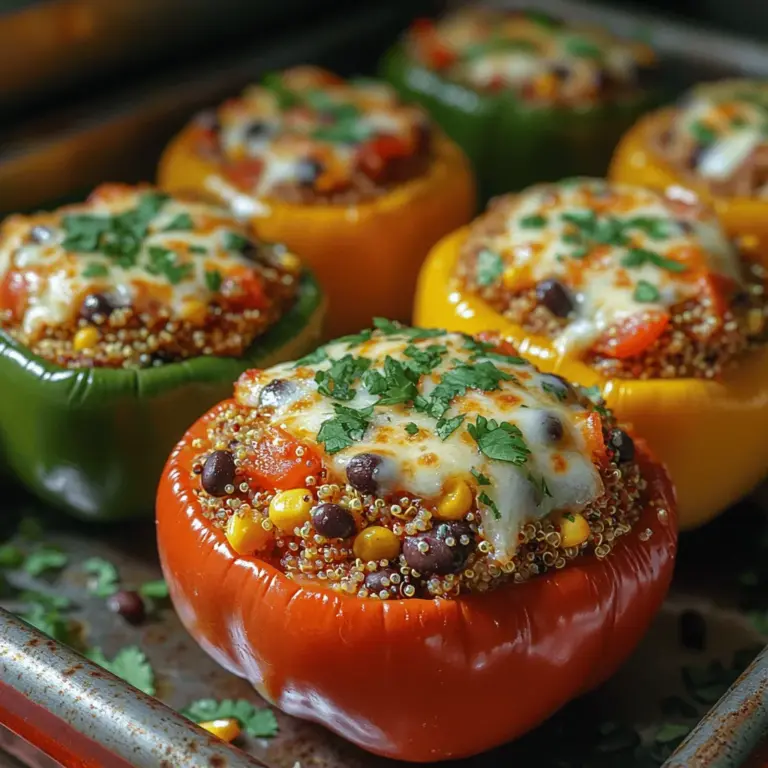
Are you searching for a vibrant, healthy meal that is not only delicious but also visually stunning? Look no further than Colorful Quinoa-Stuffed Bell Peppers. This dish is a feast for the eyes and the palate, featuring an array of colorful bell peppers stuffed with a savory, nutritious quinoa filling. It’s perfect for anyone looking to incorporate more plant-based meals into their diet or simply wanting to enjoy a wholesome, hearty dish that satisfies without weighing you down.
Quinoa, often hailed as a superfood, takes center stage in this recipe. Packed with protein, fiber, and essential nutrients, it complements the bell peppers which are rich in vitamins, antioxidants, and hydration. Together, they create a balanced meal that’s not only healthy but also offers a burst of flavor and texture with every bite. Whether you’re hosting a dinner party or just cooking for yourself, these stuffed peppers are sure to impress.
The Benefits of Quinoa and Bell Peppers
Before diving into the preparation of this delightful recipe, let’s explore the health benefits of the two main ingredients: quinoa and bell peppers.
Nutritional Profile of Quinoa
Quinoa is often referred to as one of the best plant-based sources of protein. Unlike many grains, it contains all nine essential amino acids, making it a complete protein. One cup of cooked quinoa provides approximately 8 grams of protein and 5 grams of fiber, which helps to keep you feeling full and satisfied. Additionally, quinoa is gluten-free, making it an excellent choice for those with gluten sensitivities or celiac disease.
Quinoa is also rich in essential minerals such as magnesium, phosphorus, and manganese, contributing to overall health. Its low glycemic index makes it a smart choice for maintaining stable blood sugar levels, and its versatility allows it to be used in a variety of dishes, from salads to breakfast bowls.
Health Benefits of Bell Peppers
Bell peppers are not just a colorful addition to your plate; they are also a powerhouse of nutrition. These crisp vegetables are particularly high in vitamins A and C, which are crucial for maintaining a healthy immune system and promoting skin health. One medium bell pepper can provide more than 150% of the recommended daily intake of vitamin C, making it one of the best sources of this important nutrient.
In addition to vitamins, bell peppers are an excellent source of antioxidants, which help to combat oxidative stress in the body. They are low in calories and high in water content, making them a perfect choice for hydration and weight management. The variety of colors—red, yellow, orange, and green—indicates different levels of nutrients and antioxidants, so incorporating a mix into your meal enhances both flavor and nutritional value.
Gathering Your Ingredients
Now that we’ve established the health benefits of quinoa and bell peppers, let’s gather the ingredients for our Colorful Quinoa-Stuffed Bell Peppers. Here’s what you will need:
Ingredients Overview
1. Bell Peppers: Choose a mix of red, yellow, and green bell peppers for a colorful presentation. Each color has a slightly different flavor profile, with red being the sweetest and green being more bitter.
2. Quinoa: Use about 1 cup of dry quinoa. You can opt for white, red, or black quinoa depending on your preference, as each type brings a unique taste and texture to the dish.
3. Vegetable Broth or Water: For cooking the quinoa, using vegetable broth will add extra flavor, while water will suffice if you prefer a more neutral taste.
4. Onion and Garlic: These aromatics enhance the overall flavor of the filling. You can use yellow or white onion and fresh garlic cloves.
5. Canned Black Beans: For added protein and texture, canned black beans are a great addition. Make sure to rinse and drain them before use.
6. Corn: Fresh or frozen corn adds sweetness and crunch. If using canned corn, be sure to drain it well.
7. Spices and Herbs: Cumin, paprika, and chili powder are excellent choices to season the filling. Fresh cilantro or parsley can be added for garnish and flavor.
Ingredient Roles
Each ingredient plays a vital role in creating a balanced dish. The quinoa serves as the hearty base, while the bell peppers provide structure and a pop of color. Onions and garlic bring depth to the flavor profile, and the beans and corn contribute additional protein and fiber. The spices tie everything together, elevating the dish with warmth and complexity.
Fresh vs. Canned Ingredients
When selecting your ingredients, it’s always best to opt for fresh produce whenever possible. Fresh bell peppers not only taste better, but they also retain more nutrients than their canned counterparts. However, using canned black beans and corn can save you time and still provide nutritional value. If you choose canned options, look for those that are low in sodium and have no added sugars.
Tips for Choosing the Best Bell Peppers
When selecting bell peppers, consider the following tips to ensure you choose the freshest and most flavorful options:
– Color: Look for vibrant colors; the skin should be shiny and free from blemishes or soft spots.
– Size: Choose bell peppers that feel heavy for their size, indicating that they are juicy and fresh.
– Freshness: Gently squeeze the peppers—if they feel firm with a slight give, they are ripe and ready to use.
Preparing the Quinoa
With your ingredients gathered, let’s move on to preparing the quinoa, which is the cornerstone of this dish.
Step-by-Step Guide on How to Prepare Quinoa
1. Rinse the Quinoa: Begin by thoroughly rinsing the quinoa under cold water using a fine-mesh strainer. This step is crucial as it removes the saponins, a natural coating that can impart a bitter taste to the quinoa.
2. Cook the Quinoa: In a medium saucepan, combine the rinsed quinoa and vegetable broth (or water) in a 2:1 ratio. For every cup of quinoa, use two cups of broth or water. Bring the mixture to a boil over medium-high heat.
3. Simmer: Once boiling, reduce the heat to low, cover the saucepan, and let it simmer for about 15 minutes, or until the quinoa is fluffy and the liquid is absorbed.
4. Fluff and Let Cool: After cooking, remove the saucepan from the heat and let it sit, covered, for an additional 5 minutes. Then, uncover and fluff the quinoa with a fork. Allow it to cool slightly before mixing it with the other ingredients.
Importance of Rinsing Quinoa Before Cooking
Rinsing quinoa is essential for removing the naturally occurring saponins that can leave a bitter aftertaste. This simple step ensures that your quinoa has a clean, nutty flavor that enhances the overall dish.
Cooking Methods: Using Vegetable Broth vs. Water
While you can cook quinoa in plain water, using vegetable broth will infuse the grains with additional flavor. This is particularly beneficial for a dish like stuffed peppers, where each ingredient should contribute to the overall taste. If you prefer a lighter flavor or are looking to reduce sodium, water is a valid alternative.
Texture and Flavor Considerations for Quinoa
The texture of quinoa should be light and fluffy, not mushy. If overcooked, it can become gummy. To achieve the perfect texture, follow the cooking times and ratios precisely. Additionally, you can enhance the flavor of the quinoa by adding herbs or spices during cooking, such as a bay leaf or a sprinkle of salt.
Prepping the Bell Peppers
Now that your quinoa is prepared, it’s time to get the bell peppers ready for stuffing.
Detailed Instructions on How to Prepare Bell Peppers for Stuffing
1. Choose Your Peppers: Select the bell peppers you wish to use. You can stick with one color or mix and match for a rainbow of flavors.
2. Wash and Dry: Rinse the bell peppers under cold water to remove any dirt or pesticide residues. Pat them dry with a clean kitchen towel.
3. Cut the Peppers: Using a sharp knife, slice the tops off the bell peppers about an inch below the stem. This will create a cap that you can set aside.
4. Remove Seeds and Membranes: Carefully scoop out the seeds and any white membranes inside the pepper. This step is crucial as it helps to reduce bitterness and allows for more filling space.
5. Pre-cook the Peppers (Optional): If you prefer your peppers to be softer, you can blanch them in boiling water for about 5 minutes before stuffing. This will reduce cooking time in the oven and enhance the tenderness.
By preparing your bell peppers this way, you create the perfect vessel for your flavorful quinoa filling.
—
This article is just the beginning of your journey to making Colorful Quinoa-Stuffed Bell Peppers. With a focus on health, flavor, and presentation, this dish is sure to become a favorite in your kitchen. Stay tuned for the next part, where we will dive into the actual stuffing process and the final cooking steps to create this beautiful and nutritious meal.
Cutting Techniques and Methods for Even Cooking
When preparing your colorful quinoa-stuffed bell peppers, achieving uniform cuts is essential for even cooking. Begin by removing the tops of the bell peppers and discarding the seeds. A sharp knife is crucial for this task. Cut the peppers in half vertically for a more stable base, or leave them whole for a more traditional presentation.
To create a stable base, trim a small slice off the bottom of the pepper (without puncturing the skin) to prevent it from tipping over in the baking dish. This technique ensures that each pepper stands upright and allows for even cooking while stuffed.
Tips for Selecting the Right Baking Dish
Choosing the right baking dish is important for both presentation and cooking efficiency. Opt for a glass or ceramic dish, as these materials provide even heat distribution. A 9×13 inch baking dish is ideal for accommodating several stuffed peppers, allowing them to sit snugly without overcrowding. If you prefer a more rustic look, a cast-iron skillet can add a delightful touch while providing excellent heat retention.
Ensure the baking dish has a lid or can be covered with aluminum foil; this will help retain moisture during the baking process, creating tender peppers that are packed with flavor.
Creating the Flavorful Filling
Sautéing the Onions and Garlic
Start your filling by heating a tablespoon of olive oil in a large skillet over medium heat. Add finely chopped onions and sauté them until they become translucent, about 4-5 minutes. This method not only enhances the onions’ sweetness but also lays the groundwork for a richly flavored filling.
Next, add minced garlic to the pan and sauté for an additional minute until fragrant. Avoid browning the garlic, as it can lead to a bitter taste. This base will infuse your quinoa and other ingredients with depth and complexity.
Importance of Layering Flavors in Cooking
Layering flavors is a fundamental technique in cooking that elevates a dish from ordinary to extraordinary. As you build your filling, think about how each ingredient contributes to the overall flavor profile. The sautéed onions and garlic create a savory foundation, while the spices and quinoa add additional layers of taste.
Incorporating the Remaining Ingredients
Once the onions and garlic are ready, add cooked quinoa, black beans, corn, diced tomatoes, and any other vegetables you wish to include, such as diced zucchini or spinach. Stir all the ingredients together until they are thoroughly mixed.
Incorporate spices like cumin and smoked paprika to enhance the filling further. These spices not only add warmth and depth but also give the dish a hint of smokiness that pairs perfectly with the sweet bell peppers.
Explanation of Spices: Cumin and Smoked Paprika
Cumin is a staple spice that brings an earthy, nutty flavor to your filling. It’s commonly used in various cuisines and pairs well with other spices and ingredients. Smoked paprika, on the other hand, adds a sweet and smoky depth, reminiscent of barbecued flavors. Together, these spices create a beautifully balanced filling that will tantalize your taste buds.
How to Adjust Seasoning to Personal Taste
Tasting as you go is key to achieving a well-seasoned dish. After adding the spices, taste the filling and adjust the seasoning with salt, pepper, or even a splash of lime juice for acidity. Remember, your personal preferences may differ, so feel free to experiment with different spices or add a pinch of cayenne for heat.
Stuffing the Peppers
Techniques for Effectively Stuffing the Bell Peppers
Once your filling is prepared, it’s time to stuff the peppers. Use a spoon or a small scoop to fill each pepper generously but avoid overstuffing, as this can lead to a messy presentation and uneven cooking. Pack the filling tightly enough that it holds its shape but allows for a little bit of expansion during baking.
Ensuring a Generous Filling Without Overstuffing
A good rule of thumb is to fill each pepper about three-quarters full, leaving some space at the top for the filling to expand. This method will help maintain the integrity of the pepper while ensuring each bite is filled with flavor.
Optional Cheese Topping: Types of Cheeses That Work Well
For cheese lovers, consider adding a sprinkle of cheese on top of each stuffed pepper before baking. Cheddar, Monterey Jack, or feta cheese are excellent options that melt beautifully and enhance the dish’s flavor. You can also experiment with vegan cheese alternatives if you prefer a dairy-free option.
Baking the Stuffed Peppers
Instructions for Baking: Covering with Foil and Uncovering at the Right Time
Preheat your oven to 375°F (190°C) while you prepare your stuffed peppers. Arrange the peppers in your chosen baking dish, standing upright. Cover the dish with aluminum foil to keep the peppers moist during the initial baking phase.
Bake the peppers for about 25 minutes covered, then remove the foil and bake for an additional 15-20 minutes until the peppers are tender and the cheese is bubbly and golden brown.
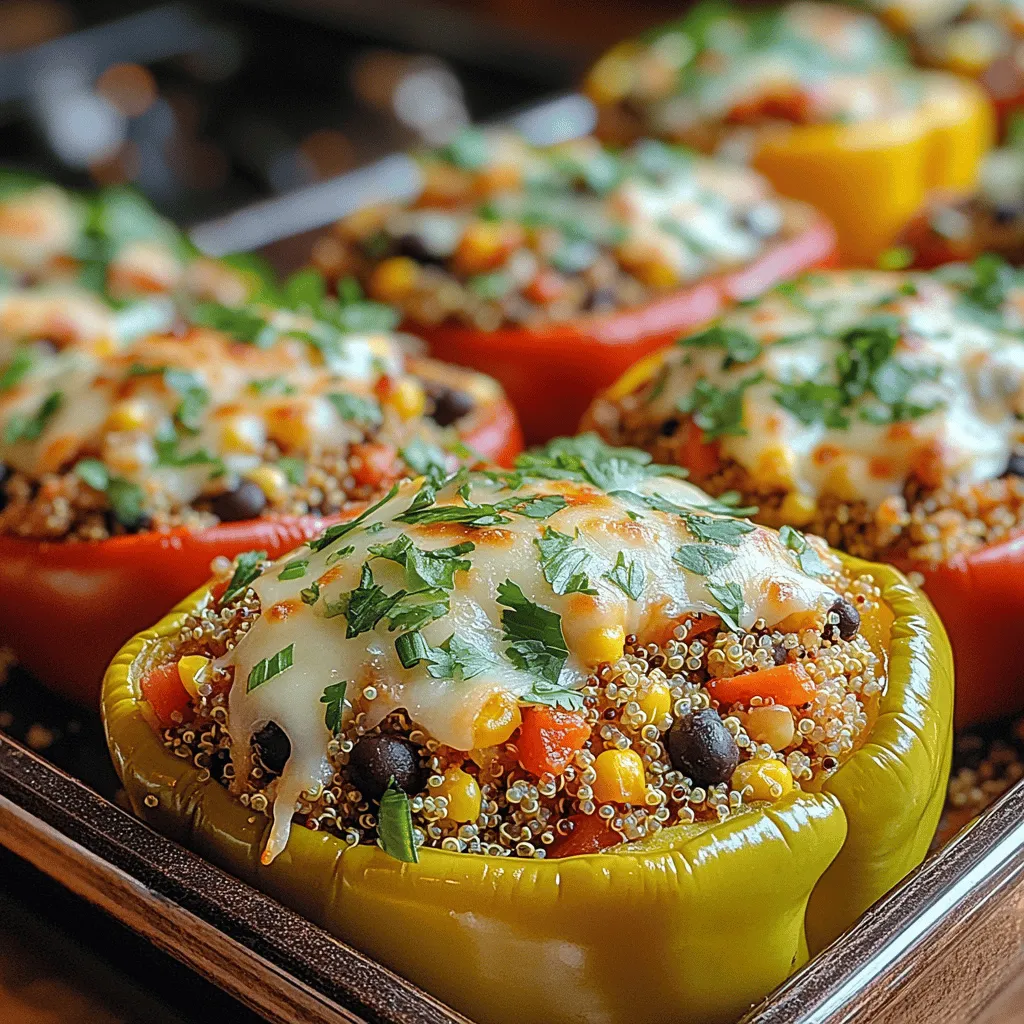
Visual Cues for Doneness: Tender Peppers and Bubbly Cheese
You’ll know the peppers are done when they are tender enough to pierce with a fork, and the filling is heated through. If using cheese, look for a golden-brown top, which indicates perfect melting.
Importance of Letting the Dish Rest Before Serving
Allowing the stuffed peppers to rest for about 5-10 minutes after baking is vital. This resting period helps the flavors meld and allows the filling to firm up slightly, making them easier to serve.
Garnishing and Serving Suggestions
Creative Ideas for Garnishing with Fresh Herbs
For a finishing touch, garnish your colorful quinoa-stuffed bell peppers with freshly chopped herbs. Cilantro, parsley, or basil can add a burst of freshness and elevate the presentation. A squeeze of lime or lemon juice over the top can also enhance the flavors and add brightness.
Serving Suggestions: Sides That Complement Stuffed Peppers
These stuffed peppers can be a meal on their own, but pairing them with a side salad or a light soup can round out your meal. A simple arugula salad with a vinaigrette complements the peppers’ heartiness without overpowering their flavors. Additionally, serving with a side of guacamole or salsa can add an extra layer of taste and texture.
Storage Tips for Leftovers and Reheating Instructions
Leftover stuffed peppers can be stored in an airtight container in the refrigerator for up to 3-4 days. To reheat, simply place them in the oven at 350°F (175°C) for about 15-20 minutes until warmed through. Alternatively, you can microwave them for a quicker option, heating in short intervals to avoid overcooking.
Conclusion
In summary, colorful quinoa-stuffed bell peppers are a delicious and nutritious dish that combines vibrant colors and flavors. They are packed with protein and fiber, making them an excellent choice for a healthy meal. This versatile recipe allows you to experiment with various ingredients and flavors, ensuring you can tailor it to your liking.
Whether you’re meal prepping for the week or serving guests at a dinner party, these stuffed peppers are sure to impress. Encourage creativity in your kitchen by trying different vegetables, grains, or spices to customize the filling. The possibilities are endless, making this dish a fantastic option for anyone looking to enjoy a hearty and visually appealing meal.

