Cheesy Hatch Chili Pasta Pockets: A Flavorful Experience
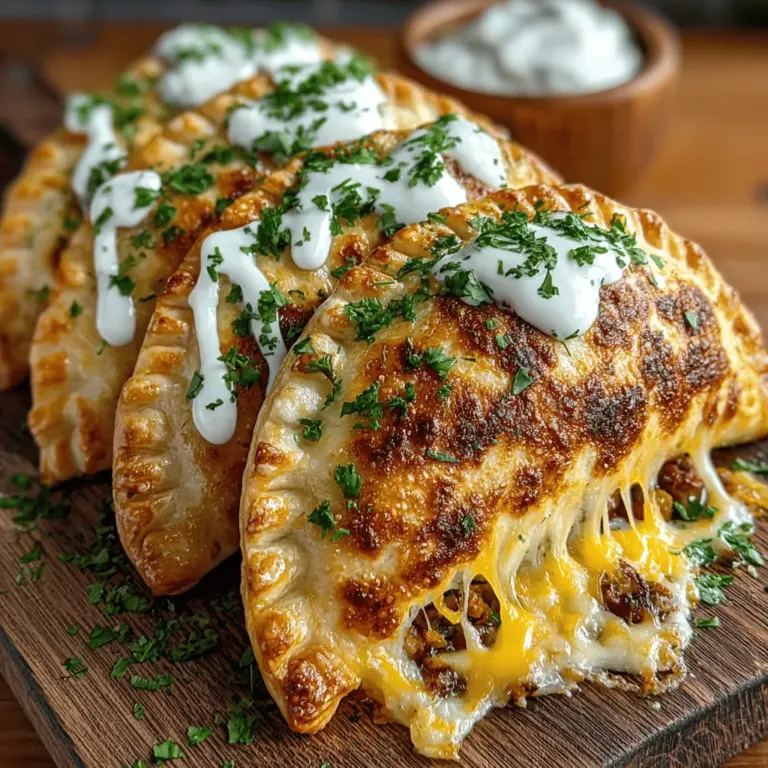
If you’re in search of a dish that combines comfort and excitement in every bite, look no further than Cheesy Hatch Chili Pasta Pockets. This delightful recipe marries the rich creaminess of melted cheese with the distinctive heat of Hatch green chilis, creating a culinary experience that is as satisfying as it is unique. Whether served as a main course or a crowd-pleasing appetizer, these pasta pockets are sure to impress with their savory flavors and appealing presentation.
What sets Hatch green chilis apart is their exceptional flavor profile—a perfect balance of mild heat and earthy sweetness. Grown in the Hatch Valley of New Mexico, these chilis have become a beloved ingredient in various dishes, celebrated for their ability to elevate any recipe. Paired with a blend of sharp cheddar and mozzarella, the filling for these pasta pockets becomes irresistibly creamy, making each bite a delightful experience.
The beauty of pasta pockets is their versatility. They can be enjoyed on their own, served with a zesty dipping sauce, or paired with a fresh salad for a complete meal. Their pocket-like structure makes them perfect for holding all sorts of fillings, allowing for creativity and personalization in the kitchen. In this recipe, we’ll guide you through the process of making these delicious Cheesy Hatch Chili Pasta Pockets from scratch, ensuring that you can recreate the magic in your own home.
Understanding Ingredients
To create the perfect Cheesy Hatch Chili Pasta Pockets, it’s essential to understand the ingredients that contribute to both the dough and the filling. The pasta dough serves as the foundation for this dish, and its components play a significant role in achieving the desired texture and flavor.
Pasta Dough Ingredients
The basic ingredients for the pasta dough include all-purpose flour, eggs, salt, olive oil, and water. Each of these elements is crucial for the dough’s structure:
– All-Purpose Flour: This is the primary ingredient that gives the pasta its body. The protein content in all-purpose flour helps create gluten, which is essential for elasticity and chewiness.
– Eggs: Eggs not only enrich the dough but also lend a beautiful golden color and contribute to the moisture content, resulting in a tender pasta.
– Salt: A key player in enhancing flavor, salt also strengthens the dough and helps in gluten development.
– Olive Oil: Adding a touch of olive oil introduces richness and helps keep the dough supple, making it easier to roll out.
– Water: The amount of water used is vital for achieving the right consistency. Too little can lead to crumbly dough, while too much can make it overly sticky.
Filling Ingredients
Now, let’s explore the filling that makes these pasta pockets so special. The combination of cheeses and Hatch green chilis creates a delightful taste experience, while additional seasonings add depth to the flavor.
– Cheeses: A mixture of sharp cheddar and mozzarella is recommended for this recipe. The sharp cheddar brings a robust flavor, while mozzarella melts beautifully, creating that gooey texture we all love. This combination ensures that the filling is both flavorful and creamy.
– Hatch Green Chilis: The star of the filling, Hatch green chilis, offer a unique blend of mild spice and sweetness. When roasted, their flavors intensify, making them a perfect addition to the cheese mixture. If you can find them fresh, that’s ideal; otherwise, canned or frozen options can also work well.
– Seasonings: To enhance the flavor of the filling, we incorporate garlic powder, onion powder, and smoked paprika. These seasonings complement the chilis and cheeses, adding complexity without overpowering the dish.
Topping Ingredients
To finish off these pasta pockets, a few simple toppings can elevate the dish to new heights:
– Sour Cream: A dollop of sour cream adds a refreshing contrast to the rich filling, balancing the flavors beautifully.
– Lime Juice: A squeeze of fresh lime juice brightens the dish, adding an acidic note that enhances the overall taste.
– Cilantro: Fresh cilantro not only garnishes the dish but also contributes a fresh, herbal note that pairs perfectly with the chilis.
– Extra Cheese: A sprinkle of additional cheese on top offers an appealing visual element and adds even more creaminess when melted.
Making the Perfect Pasta Dough
Now that we have a clear understanding of the ingredients, let’s dive into the process of making the pasta dough. Creating homemade pasta from scratch may seem daunting, but with a step-by-step approach, you’ll find it to be a rewarding experience.
Step 1: Mixing the Ingredients
Start by measuring out your all-purpose flour, typically around two cups. Create a mound of flour on a clean work surface, making a well in the center. Crack two large eggs into the well and add a pinch of salt and a tablespoon of olive oil. Using a fork, gently beat the eggs, gradually incorporating the flour from the edges of the well. Continue mixing until the dough begins to come together.
Step 2: Achieving the Right Texture
Once the mixture is combined, it’s time to knead the dough. Transfer it to a lightly floured surface and knead for about 8-10 minutes, or until the dough is smooth and elastic. If the dough feels too sticky, sprinkle in a little more flour as needed. The goal is to achieve a soft, pliable dough that holds its shape without being overly dry.
Step 3: Resting the Dough
After kneading, wrap the dough in plastic wrap or cover it with a damp towel. Allow it to rest for at least 30 minutes at room temperature. This resting period is essential, as it relaxes the gluten, making it easier to roll out later.
Step 4: Storing and Handling Pasta Dough
If you’re not using the dough immediately, it can be stored in the refrigerator for up to 2 days or frozen for longer storage. When you’re ready to use it, let it come to room temperature before rolling it out. This will help achieve the best texture and prevent the dough from cracking during the rolling process.
Crafting the Filling
While the dough is resting, you can prepare the cheesy filling. Start by roasting your Hatch green chilis until they’re charred and blistered, either in the oven or on a grill. Once roasted, let them cool, then peel off the skins, remove the seeds, and chop them finely.
In a mixing bowl, combine the chopped chilis with the shredded sharp cheddar and mozzarella cheeses. To enhance the flavor, add the garlic powder, onion powder, and smoked paprika. Mix everything thoroughly until the ingredients are well combined, creating a rich and flavorful filling that will be the heart of your pasta pockets.
As you prepare to assemble your Cheesy Hatch Chili Pasta Pockets, you will experience the anticipation of crafting a dish that is not only delicious but also a testament to the joy of cooking from scratch. The next steps will guide you through the assembly and cooking process, ensuring that your pasta pockets are perfectly formed and bursting with flavor. Stay tuned for the continuation of this culinary journey!
Mixing Techniques for Even Distribution of Flavors
When creating the filling for your Cheesy Hatch Chili Pasta Pockets, achieving an even distribution of flavors is essential. Start by finely chopping the hatch chiles and any other ingredients you plan to include, ensuring they are uniformly sized. This helps them cook evenly and meld together in flavor.
For the cheese, consider using a combination of cream cheese and shredded cheese varieties like Monterey Jack or cheddar for a creamy texture. Mix these ingredients in a bowl using a spatula or fork to break down any clumps and ensure that the cheese blends thoroughly with the chiles. For a little heat, you can add diced jalapeños or crushed red pepper flakes, adjusting the spice level according to your preference.
If you want to incorporate additional ingredients, consider adding cooked and crumbled chorizo for a meaty element or black beans for extra protein and texture. Remember to taste the filling before sealing the pockets; this is your chance to tweak the seasoning and spice as needed.
Rolling and Assembling the Pasta Pockets
Techniques for Rolling Out the Dough Evenly
Once your filling is ready, it’s time to focus on the pasta dough. Start by dividing your dough into manageable portions—this will make it easier to roll out and shape. Use a well-floured surface and a rolling pin to roll the dough into thin sheets. Aim for a thickness of about 1/16-inch, as this will ensure the pasta cooks evenly and holds the filling well.
Importance of Thickness and Consistency
A consistent thickness is key to preventing the pasta from tearing during the cooking process. If some parts of the dough are thicker than others, they might not cook through while the thinner areas could become overly chewy. Use a pasta machine if you have one, as it provides a uniform thickness that can be difficult to achieve by hand.
Tips on Cutting and Shaping the Pasta Circles
After rolling out the dough, use a round cutter or a glass to cut out circles for your pasta pockets. Each circle should be about 3 to 4 inches in diameter, providing ample space for the filling. Gather any excess dough, re-roll it, and cut additional circles until all the dough is used.
Methods for Sealing the Pockets to Prevent Leakage During Cooking
To prevent leakage during cooking, it’s crucial to seal the pasta pockets properly. Place a spoonful of filling in the center of each dough circle, leaving space along the edges. Moisten the edges of the dough with a little water to create a seal, then fold the dough over the filling to form a half-moon shape. Press the edges firmly together, making sure there are no air pockets inside. For an added decorative touch, you can crimp the edges with a fork or pinch them with your fingers.
Cooking the Pasta Pockets
Best Practices for Boiling Pasta Pockets
Bring a large pot of salted water to a rolling boil before adding the pasta pockets. The salt not only seasons the pasta but also enhances its flavor. Gently lower the pockets into the boiling water, ensuring not to overcrowd the pot, as this can lead to sticking.
Importance of Salted Water and Cooking Time
Cook the pasta pockets for approximately 3-5 minutes, or until they float to the surface. Floating is a good indicator that they are nearly done; however, a quick taste test will confirm their doneness. Remember that cooking time may vary based on the thickness of your pasta dough.
Signs to Look For to Ensure They Are Perfectly Cooked
Once cooked, the pasta pockets should be tender but still have a slight bite. Avoid overcooking, as this can lead to a mushy texture and may cause the filling to leak out. When finished, use a slotted spoon to remove them from the pot and gently place them on a plate.
Alternative Cooking Methods
If you prefer a crispy texture, consider pan-frying or baking the pasta pockets. For pan-frying, heat a little oil in a skillet over medium heat and cook the pockets until golden brown on both sides. Baking can be done by placing the filled pockets on a parchment-lined baking sheet and baking at 375°F (190°C) for about 15-20 minutes until golden and crispy.
Creating the Lime Sour Cream Topping
Step-by-Step Guide on Preparing the Topping
To complement your Cheesy Hatch Chili Pasta Pockets, prepare a refreshing lime sour cream topping. Start by combining sour cream with freshly squeezed lime juice in a bowl. For a creamier texture, mix in a little mayonnaise or Greek yogurt.
Importance of Balancing Flavors with Lime Juice
The lime juice not only adds brightness but also balances the richness of the cheese filling. Taste the mixture and adjust with more lime juice or a pinch of salt, depending on your preference.
Variations for the Sauce to Enhance the Dish
For added flavor, consider mixing in chopped fresh herbs such as cilantro or chives. You can even add a dash of hot sauce or diced jalapeños for an extra kick. This topping can be prepared ahead of time and stored in the refrigerator until you’re ready to serve.
Assembling and Serving the Dish
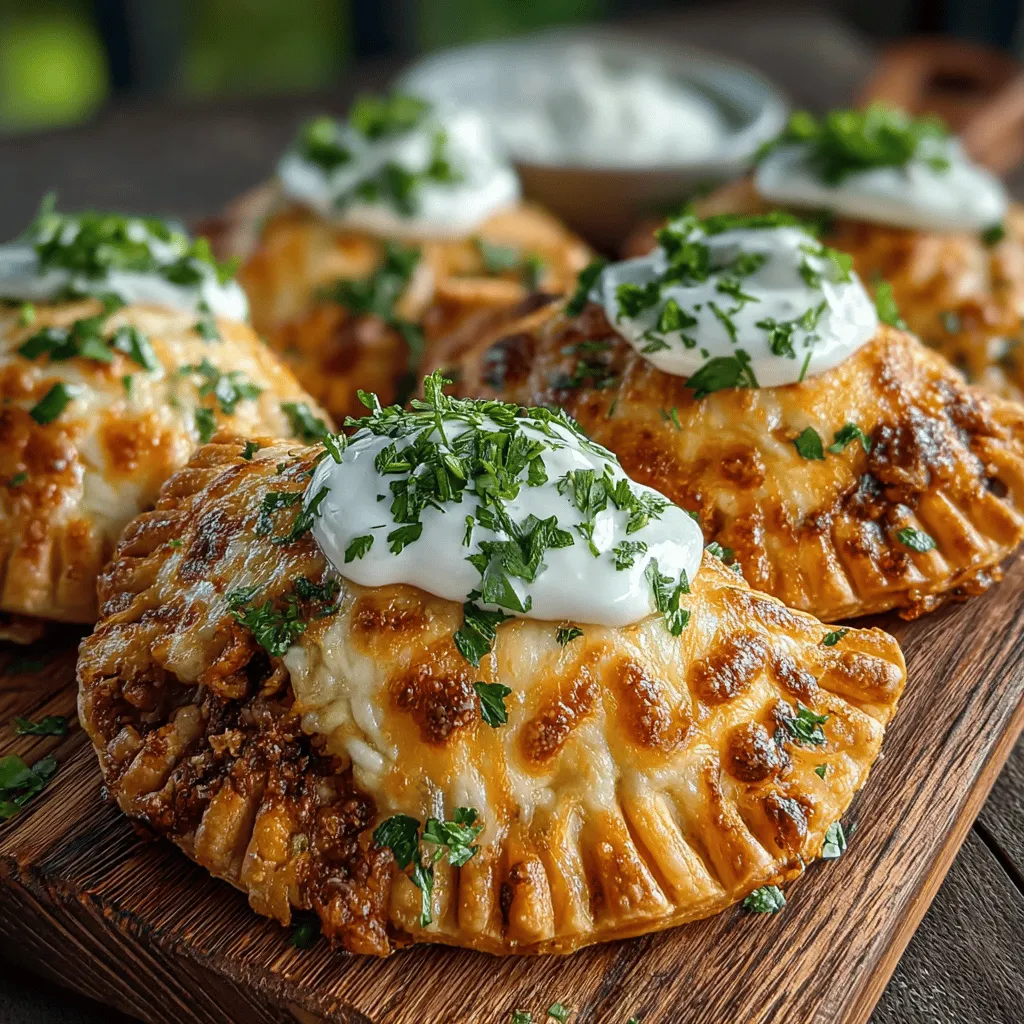
Presentation Tips for an Appealing Plate
When it comes to serving your Cheesy Hatch Chili Pasta Pockets, presentation is key. Arrange the pockets on a large serving platter or individual plates. Drizzle the lime sour cream topping over the pasta pockets generously.
Importance of Garnishing with Cilantro and Cheese
To elevate the dish further, garnish with freshly chopped cilantro and a sprinkle of additional shredded cheese. This not only adds color but also enhances the flavor profile of the dish.
Suggestions for Pairing with Sides or Beverages
These pasta pockets pair beautifully with a side salad of mixed greens dressed in a light vinaigrette. For beverages, consider serving with a crisp lager or a refreshing margarita that complements the flavors of the dish.
Conclusion
In summary, the Cheesy Hatch Chili Pasta Pockets offer a delightful combination of flavors and textures that will impress your family and friends. This recipe invites you to experiment—adjust the fillings, spice levels, and toppings to make it your own.
The satisfaction of making homemade pasta is unmatched, and sharing this dish with loved ones will surely create cherished memories around the dinner table. Embrace the joy of cooking and the deliciousness of these pasta pockets, and watch as they become a staple in your culinary repertoire. Enjoy the process and happy cooking!

